Learn
how to create this freezing cold manipulation with Photoshop! You'll
learn how to work with difference ice and crystal photos and complete
the look with a cold blue photo effect.
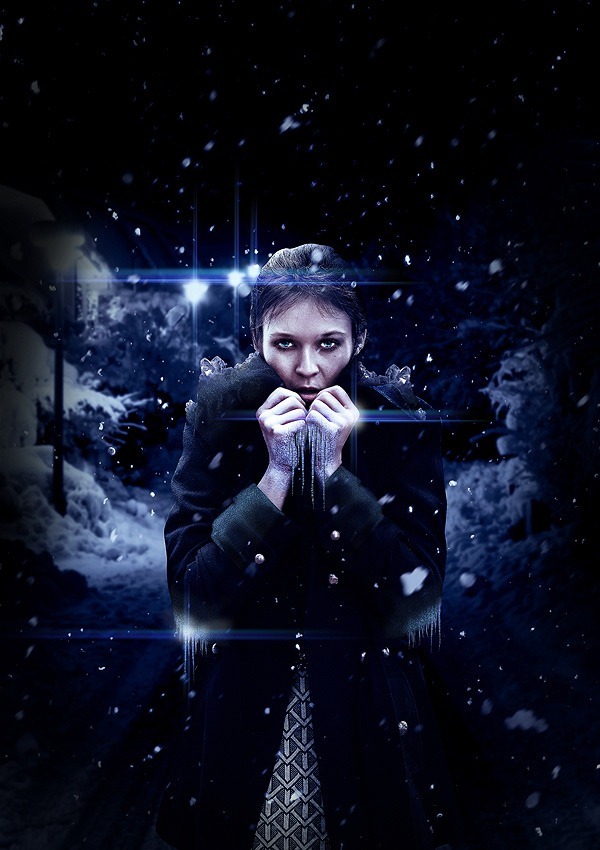
Freezing Cold Portrait Photo Manipulation Photoshop Tutorial
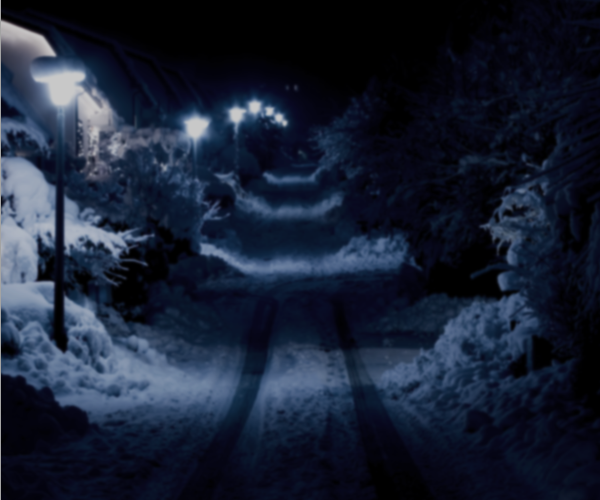
 Here’s how your background should look.
 Here’s how the background should look now.
 Create
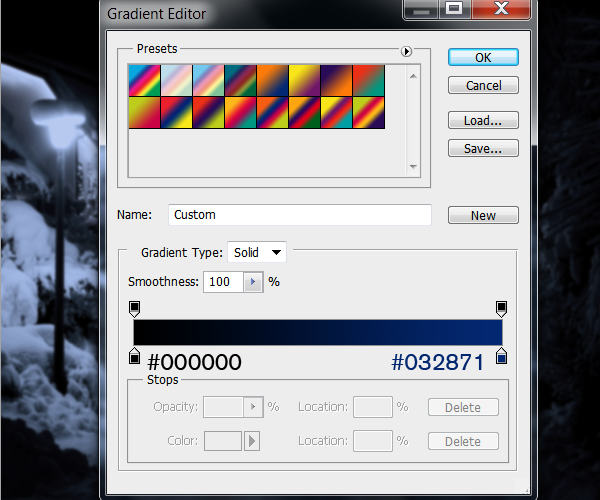
a gradient like shown below. To create this gradient, click on the
bottom left stop then change the color to black (#000000) then click OK.
Click on the bottom right stop then set the color to #032871 then click
OK and OK again to exit out of the Gradient Editor.
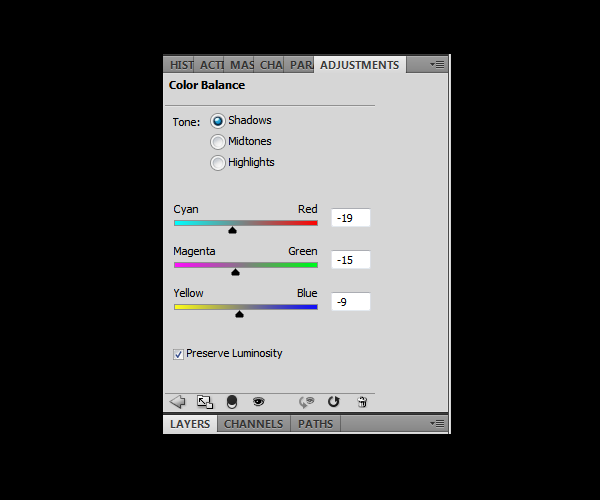
 Set the Tone to Shadows then apply the settings shown below.
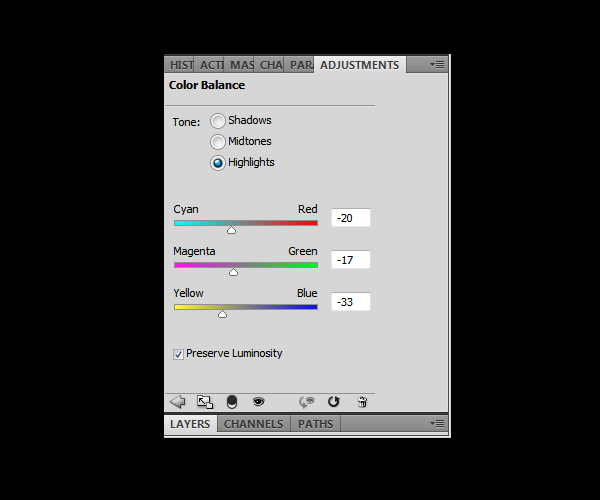
 Set the tone to Highlights then apply the settings shown in the image below.
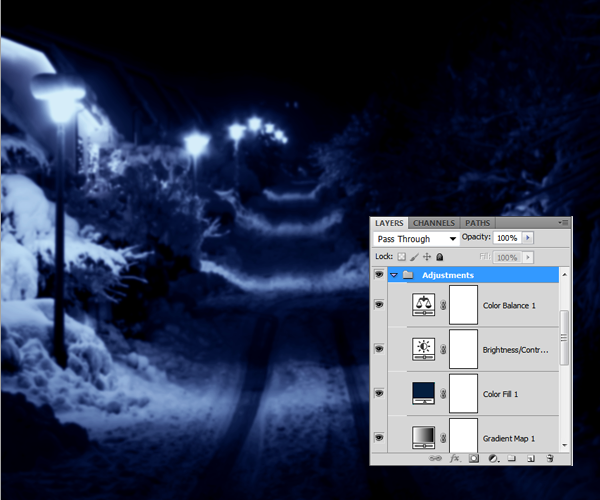
 This is how your Layers palette should look right now.
 Next,
sharpen (Filter > Sharpen > Sharpen) the model to enhance the
quality of the image (You can repeat this filter by pressing
Ctrl/Cmd+F). You can also place this layer into a new group (Ctrl/Cmd+G)
called “Model” to keep things organized.
Follow the example below:
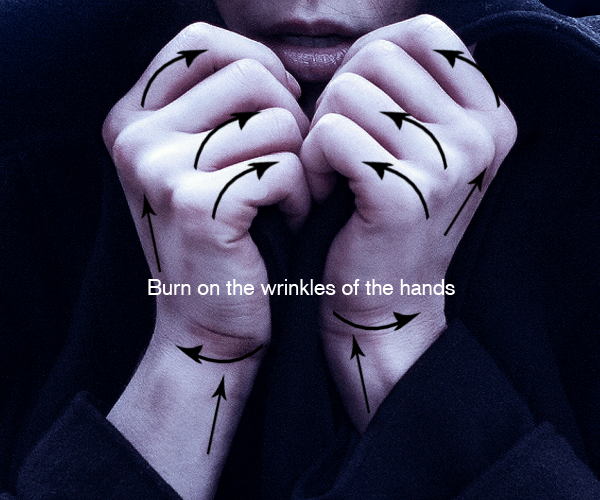
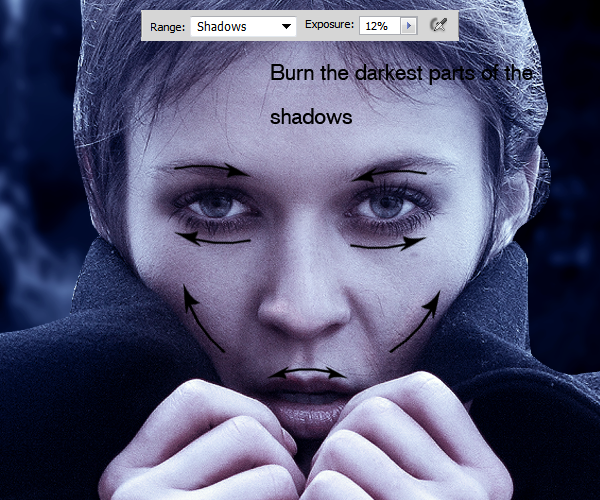 Burn the shadows on the hands, especially over the wrinkles following the direction of the shadows.
 Also burn over the hairline and inside the eyes.
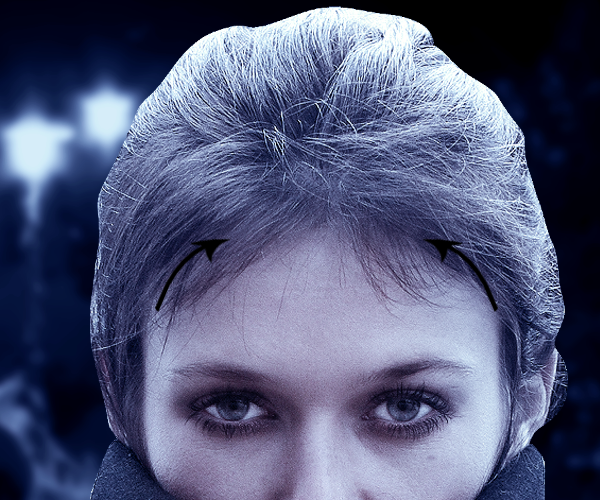
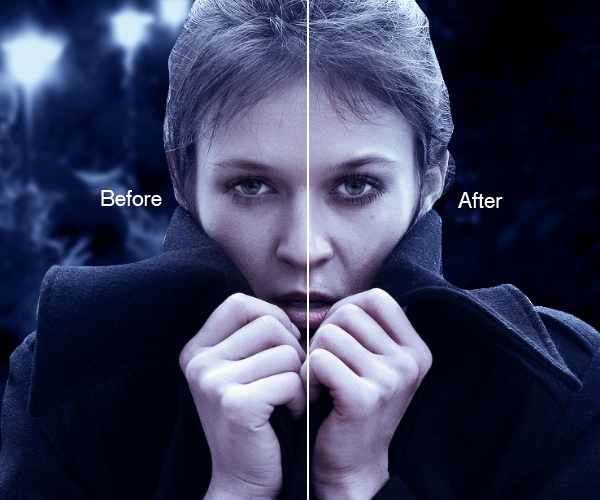
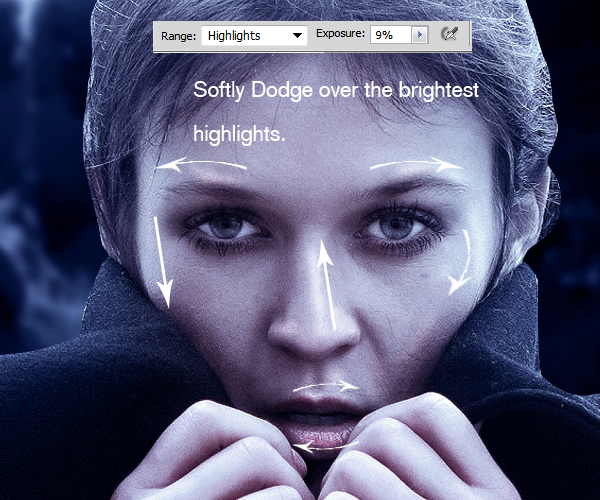 Here's the before and after comparison of this dodge/burn technique..
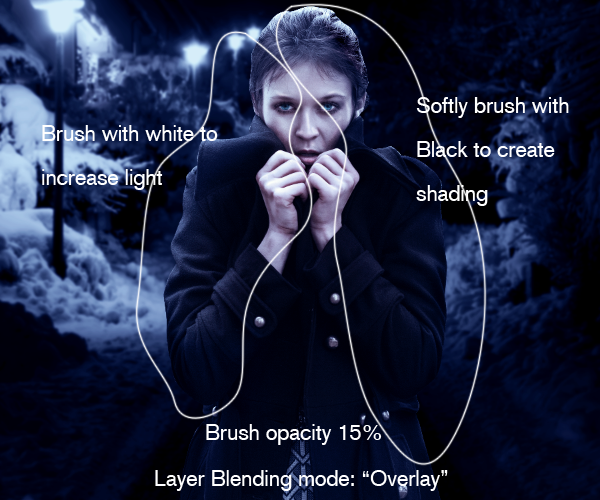 Clip mask another new layer if necessary on top of the model to further increase the shading.
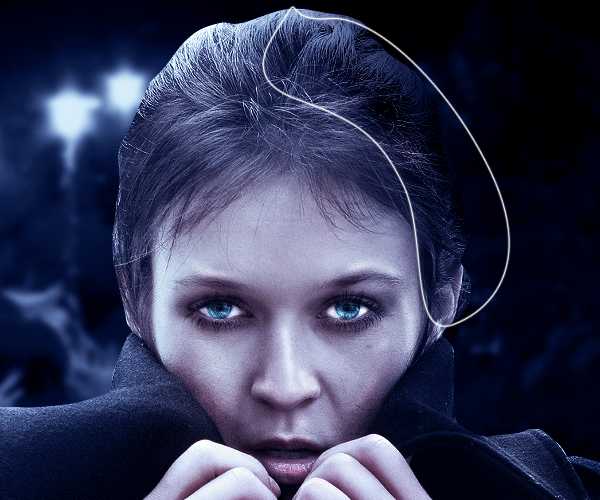
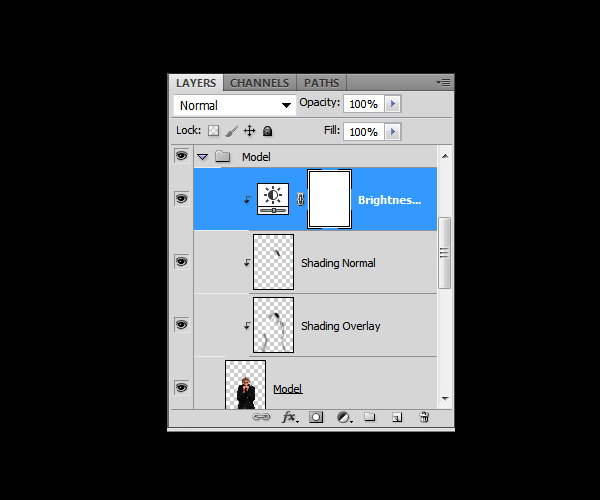
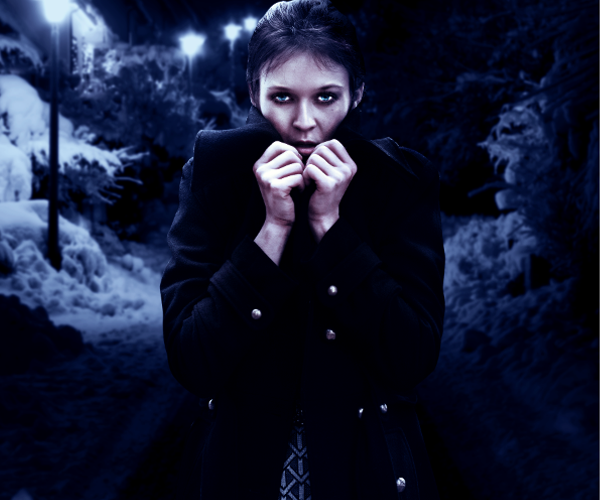
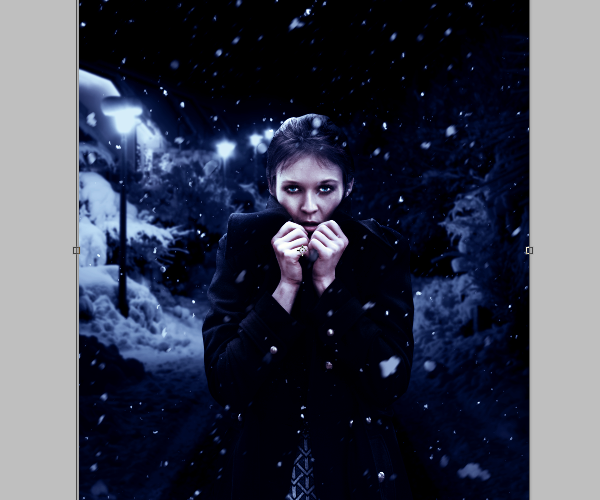
 Your Layer module and the model should look now something like this:
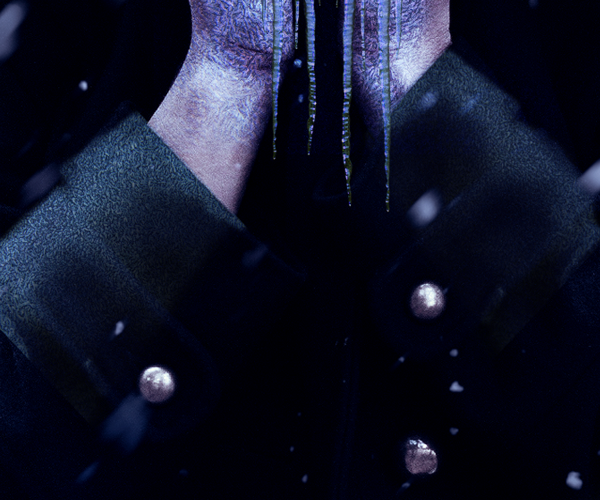
 Duplicate and resize a couple of times more the icicle and place them in the center of the hand:
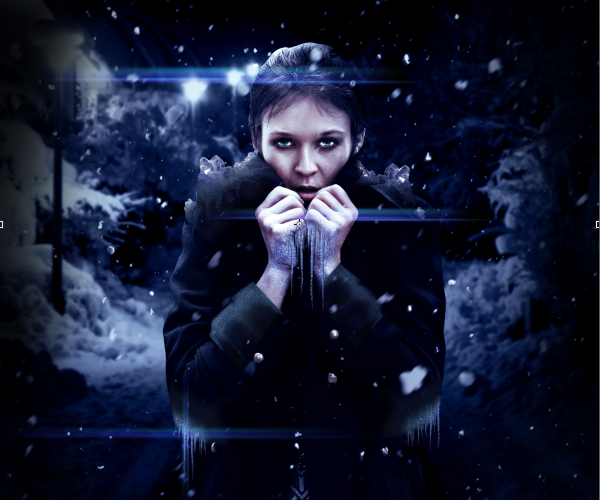
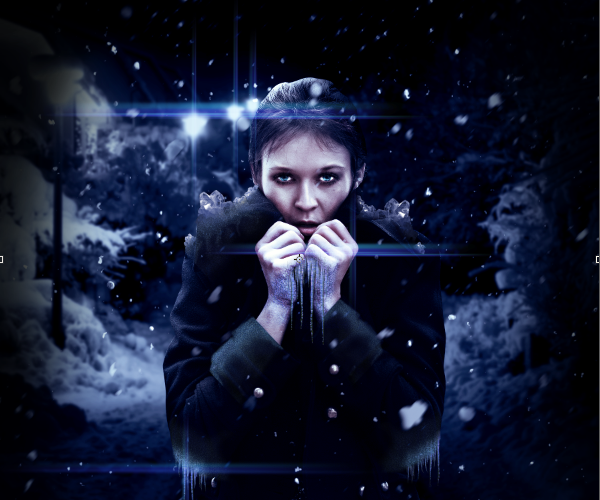
![final_results[1] final_results[1]](http://photoshoptutorials.ws/images/stories/212624bf5e9e_B250/final_results1.jpg)
Preview of Final Results

Download the PSD
Frozen.zip | 6.63 MB
Download from Website
Download from Website
Freezing Cold Portrait Photo Manipulation Photoshop Tutorial
Resources
- Background - sxc.hu
- Girl - sxc.hu
- Frost Texture - sxc.hu
- Icicles - sxc.hu
- Snowflakes - sxc.hu
- Crystal - enchantedgal
Step 1
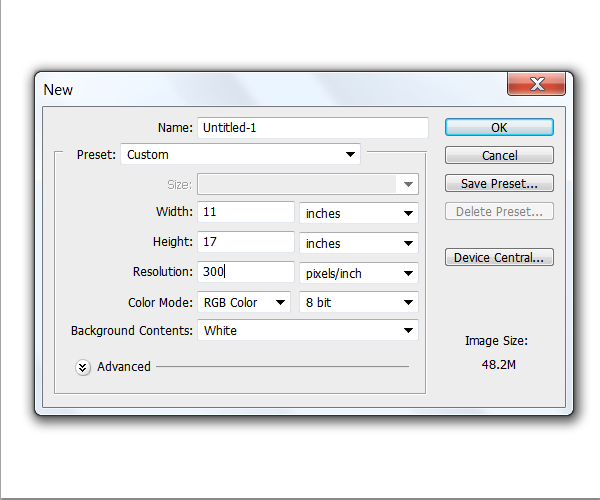
Create a new document in Photoshop. It should be around 11 inches wide by 17 inches long and with a depth resolution of 300dpi.
Step 2
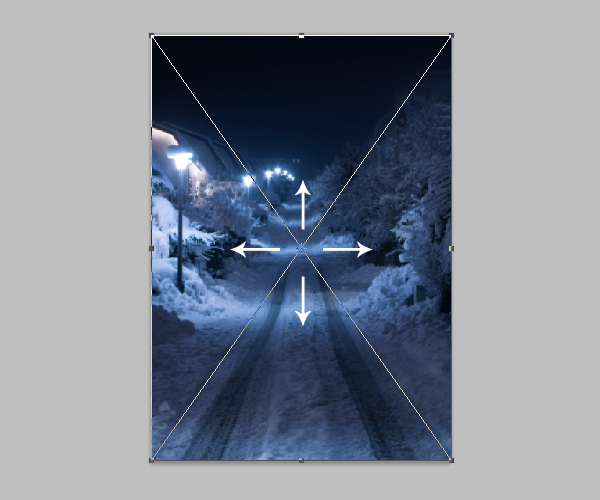
Drag to your document the background frozen road stock image and resize it to fill all the canvas by dragging the anchor points to fit the whole image:
Step 3
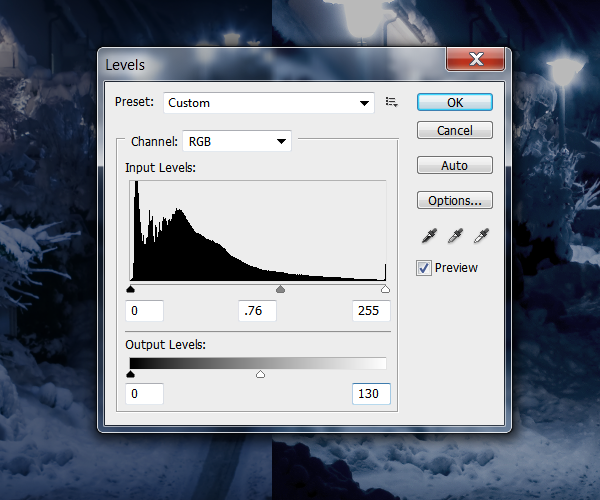
The background looks too bright at the moment and we need to change that in order to create a gloomy dark night mood. Open up the levels menu (Image > Adjustments > Levels or Ctrl+L) and apply the settings as shown below:
Step 4
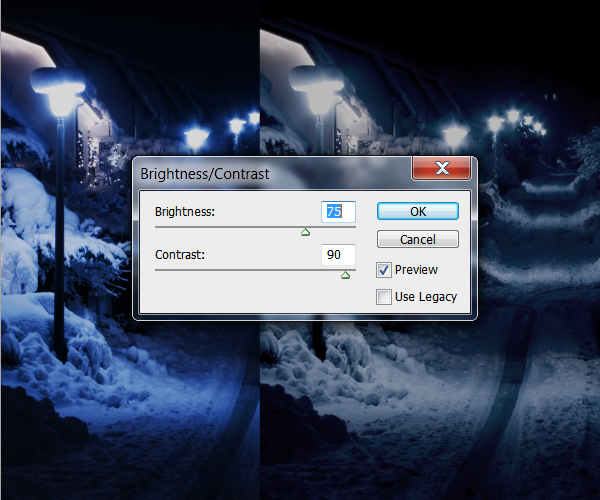
Use the Brightness/Contrast tool (Image > Adjustments > Brightness/Contrast) and set the Brightness value to 75 and Contrast to 90
Step 5
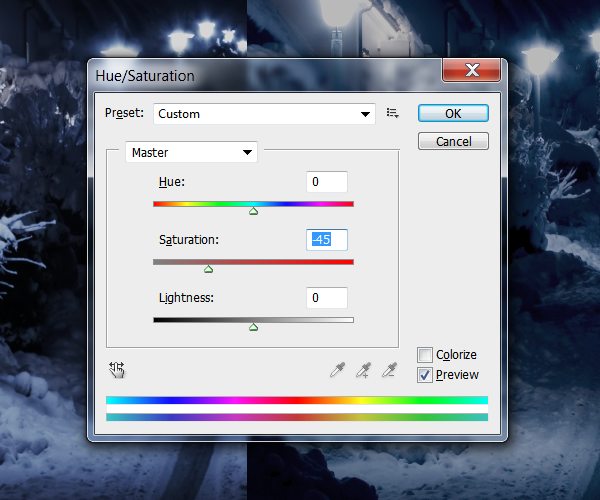
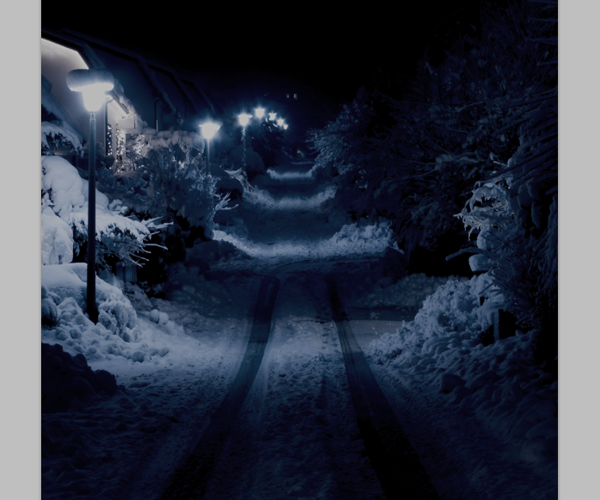
Since we made some changes to the lighting of the background, the colors got a bit too saturated. To fix this, use the Hue/Saturation tool (Image > Adjustments > Hue/Saturation or Ctrl+U) to lower the saturation to –45.

Step 6
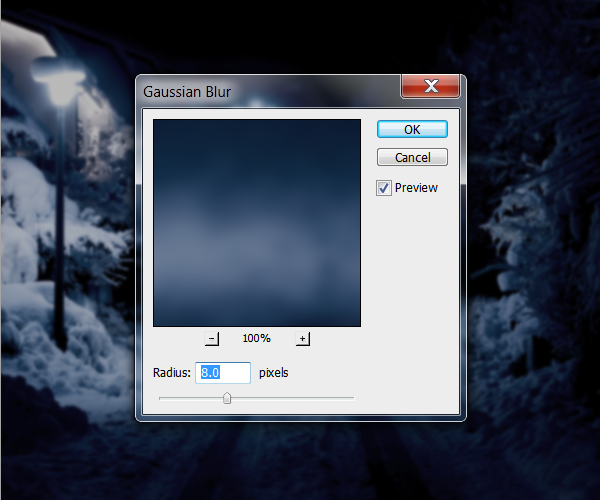
Now we’re going to blur the background to add some depth to the overall image and ensure it doesn’t upstage the rest of the photo manipulation. Apply a Gaussian Blur (Filter > Blur > Gaussian Blur) with a radius of 8 pixels.

Step 7
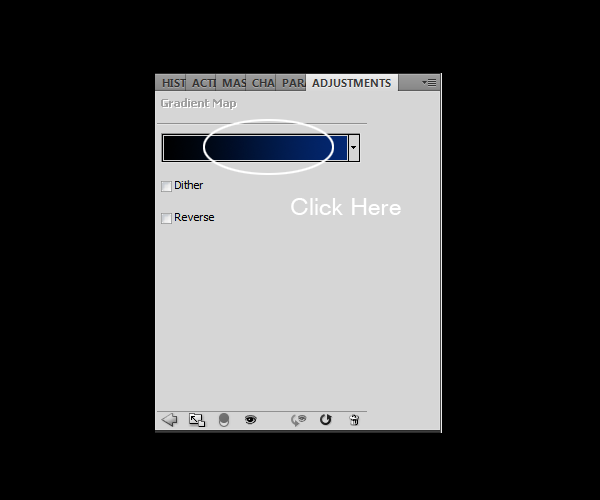
In this step, we’re going to set our adjustment layers so that we can work under them and create a moody feel to our composition. Start by selecting all the adjustment layers in the Layers palette then place them all into a new layer group (Ctrl+G). Name this group “Adjustments”. Next, add a Gradient Map fill layer (Layer > New Adjustment Layer > Gradient Map). Click on the Gradient to bring up the Gradient editor.

Step 8
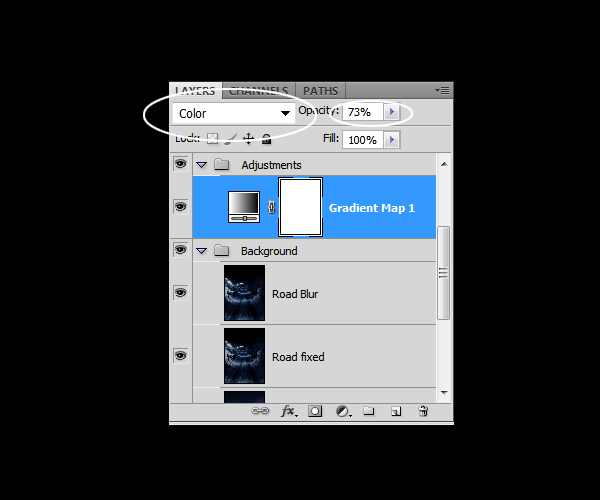
Set the blending mode of this layer to Color then lower the opacity to around 73%.
Step 9
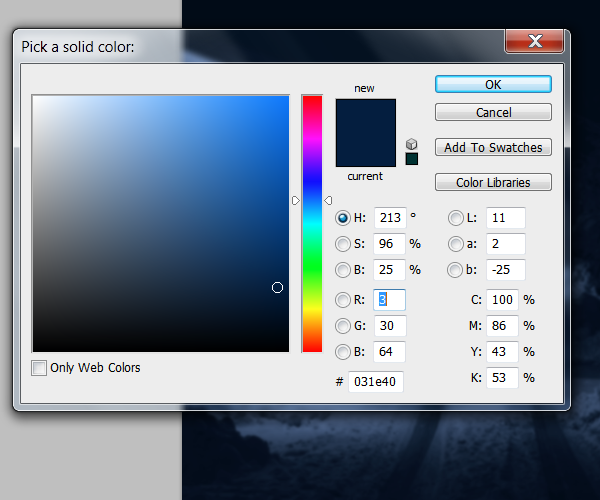
Create a new Solid Color fill layer (Layer > New FIll Layer > Solid Color) on top of the Gradient Map adjustment layer. Set the color of this fill layer to #031E40.
Step 10
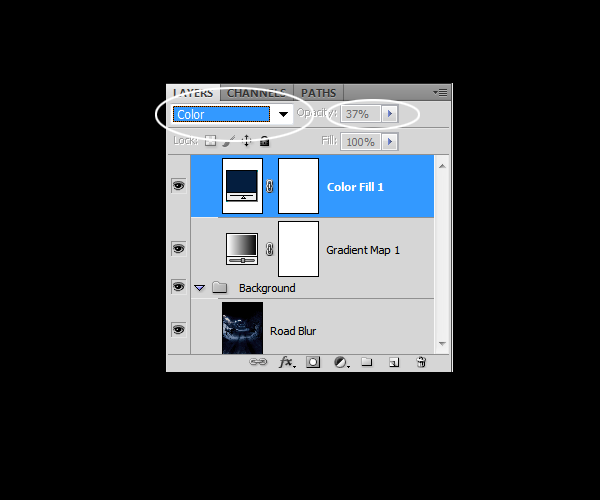
Change the blending mode of the Color Fill layer to Color and lower its opacity to around 37%.
Step 11
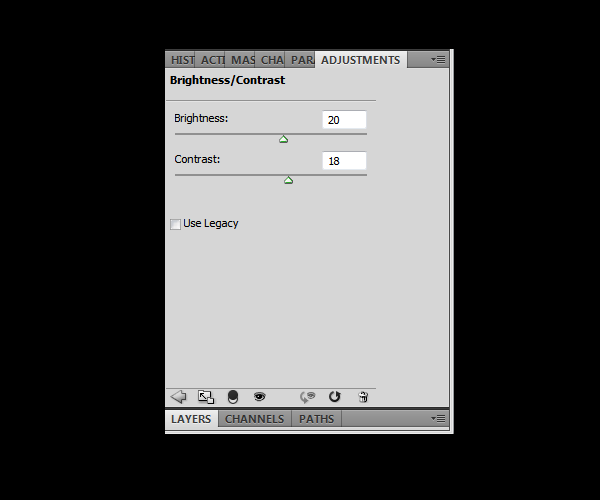
Add a new Brightness/Contrast adjustment layer (Layer > New Adjustment Layer > Brightness/Contrast) and position it as the top layer. Apply the settings shown in the image below.
Step 12
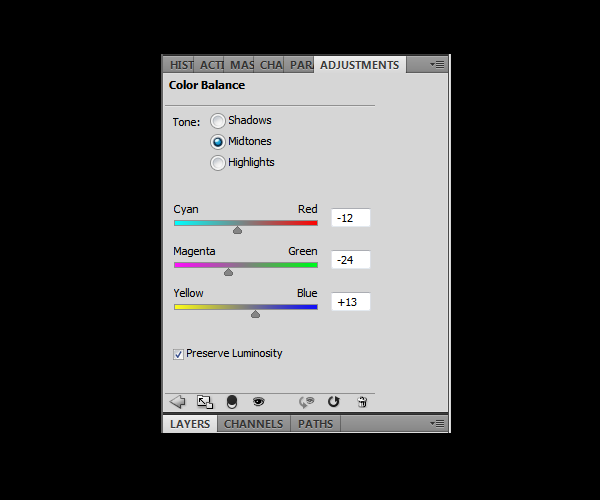
Add a new Color Balance adjustment layer (Layer > New Adjustment Layer > Color Balance) and set it as the top layer. Set the tone to Midtones then apply the settings shown in the image below.


Step 13
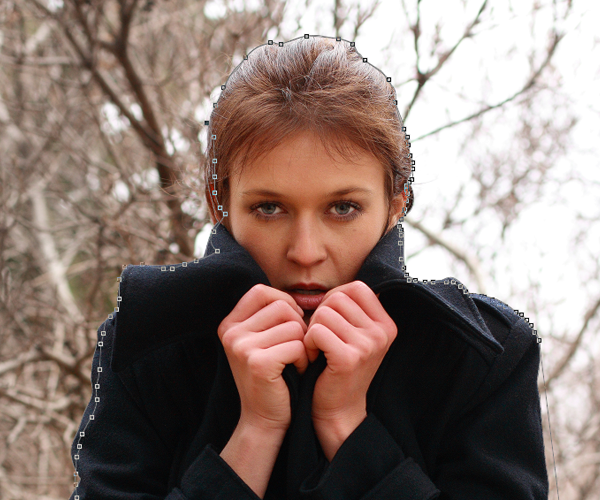
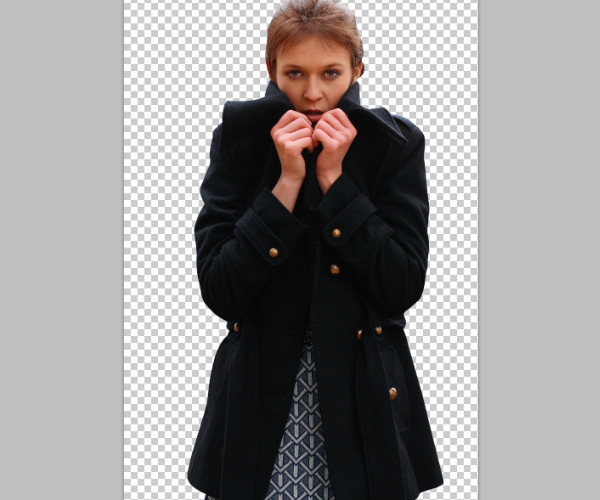
Open the image of the model then use the Pen tool (P) to draw a path along the edge of the girl trying to keep as much detail as you can so you can make a clean extraction from the background.
Step 14
Once you’ve closed the path, right-click on the path then select “Make Selection”. Copy and paste it into the other document. You can close this image of the model.
Step 15
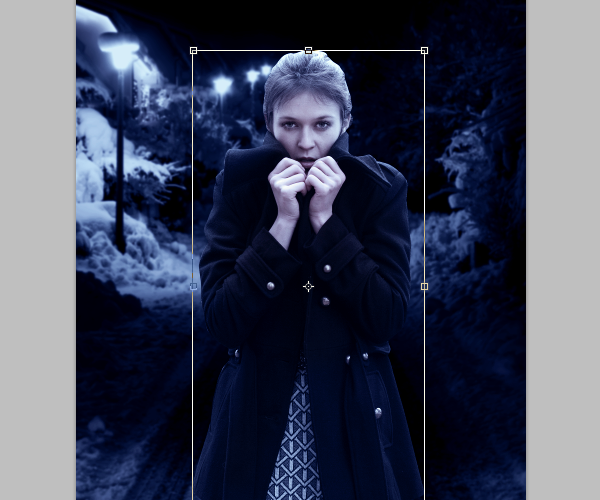
After pasting your model into your original document, position this new layer under the “Adjustments” group. Resize it slightly so that it covers a bigger area of the canvas. You can resize layers with the Free Transform tool (Ctrl+T or Edit > Free Transform).
Step 16
Select the Burn tool (O) then set your brush size to a small round brush around 30 pixels with a hardness of 0%. Lower the exposure to 12% then set the range type to Shadows. Gently brush along the darker areas of the skin to darken the shadows and give it a slight HDR look. We're going to do this directly on the models face so be careful to not overdo it.Follow the example below:


Step 17
Switch to the Dodge tool (You can also hold shift while using the Burn tool) then change the range to "Highlights" and exposure to 9%. The brush size and hardness should be the same. We're going to do the same we did with the Burn tool except this time we'll be dodging over the brightest highlights in the image to give them more punch.

Step 18
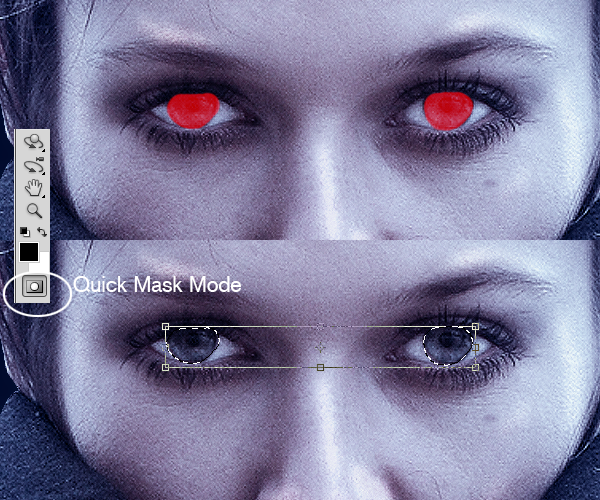
Now we're going to increase the vibrancy and brighten the eyes. To do this, select the Brush tool (B) then switch to "Quick Mask Mode". Brush over the eyes then turn Quick Mask Mode off by clicking on the quick mask button again. You'll get a selection of the eyes. Invert the selection (Ctrl/Cmd+Shift+I or Select > Invert).
Step 19
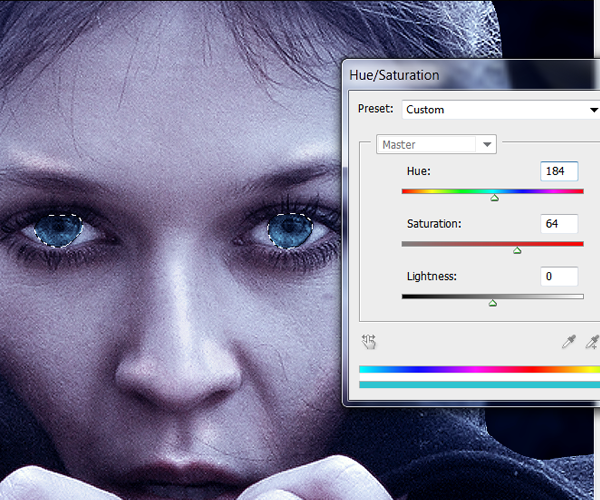
Use the Hue/Saturation tool (Ctrl/Cmd+U or Image > Adjustments > Hue/Saturation) to change the color of the pupil to a vibrant blue.
Step 20
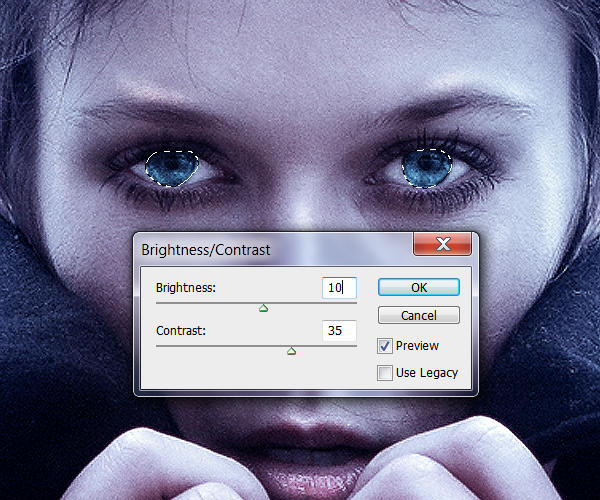
Use the Brightness/Contrast tool (Image > Adjustments > Brightness/Contrast) to brighten the pupils.
Step 21
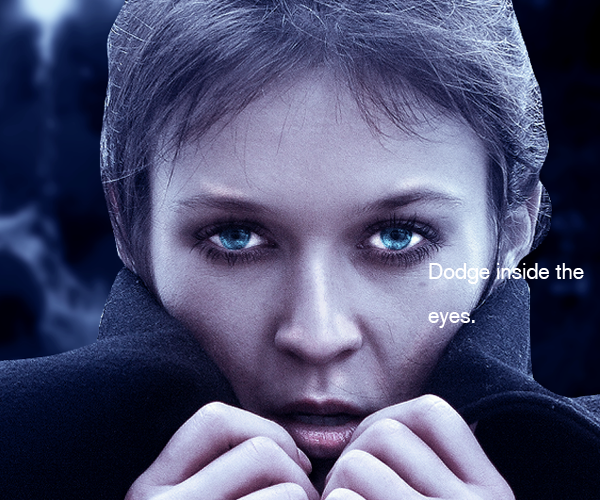
Switch back to the Dodge tool and dodge the eyes to make them brighter.
Step 22
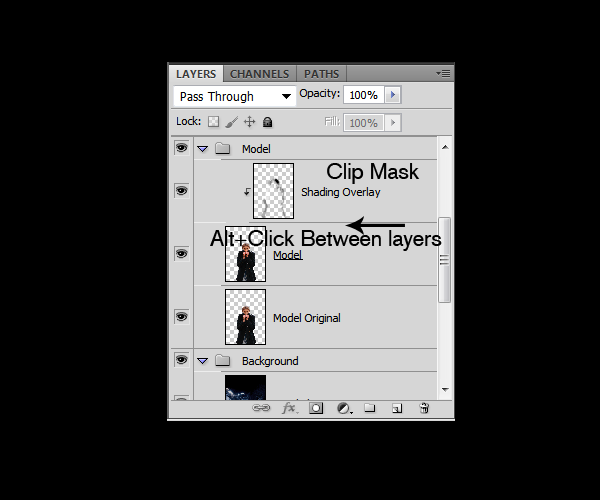
Create a new layer on top of the model and clip mask them together.(Click between the layer thumbs while holding Alt):
Step 23
Change this new layer's blending mode to "Overlay" we are going to paint some Shading and light to match the background on the model. Select the Brush tool with a brush of about 500 pixels wide and 0% hardness with the opacity set to 25% and change your foreground color to black.Now softly brush over the right side to shade it.Brush over as many times needed to get the result like shown below.Once you are done with this,Change your color to white and add some light to the right side of the model:

Step 24
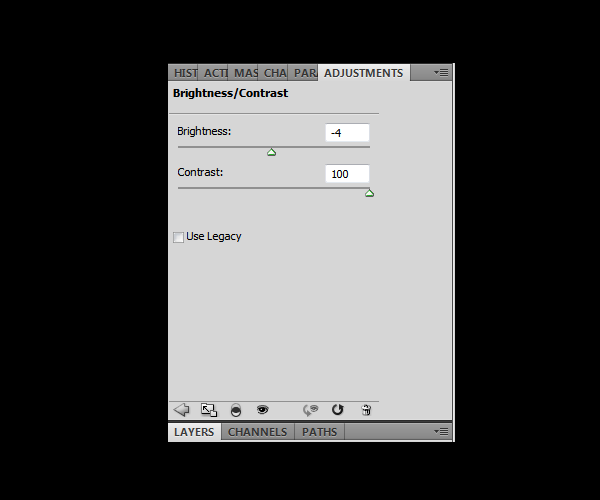
Create a new Brightness and Contrast Adjustment layer on top of the shading layers and clip mask it to them.Use the next values to increase the contrast on the model:


Step 25
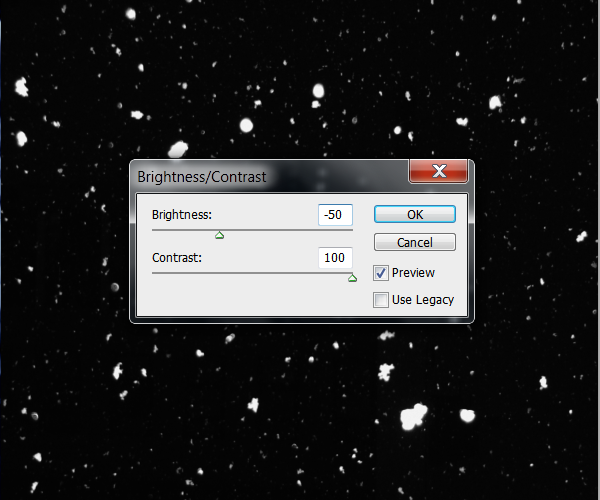
Drag the Snow stock image to your document and rotate it 90° so it is vertical,then stretch it to fill the whole canvas,this next layers should also be placed under the "Adjustments" group. Open the Brightness and contrast menu and apply the next settings:
Step 26
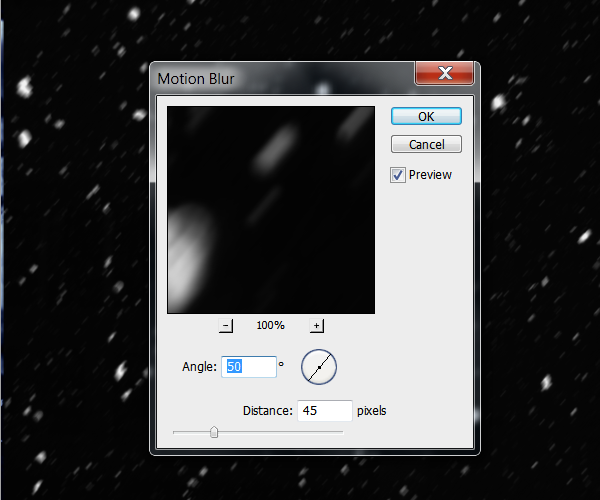
Now duplicate this layer.On the first layer we are going to apply a blur filter to give some motion to the snow flakes.Go to Filter>Blur>Motion Blur and set the angle to 50° and the Distance to 45 pixels:
Step 27
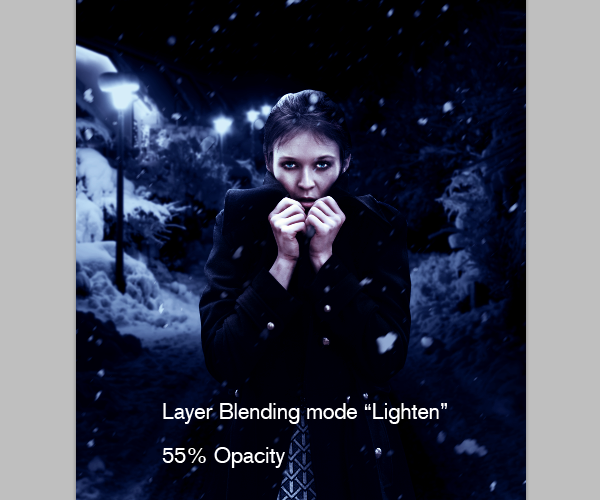
Lower this layer opacity to 55% and change its blending mode to "Lighten". Now take the eraser tool (E) and erase all the little snowflakes leaving only the biggest ones:
Step 28
Apply a sharpen filter to the duplicated snow layer and change its blending mode also to "Lighten".Then using the eraser,erase the biggest snowflakes so it only shows the fade blurred ones:
Step 29
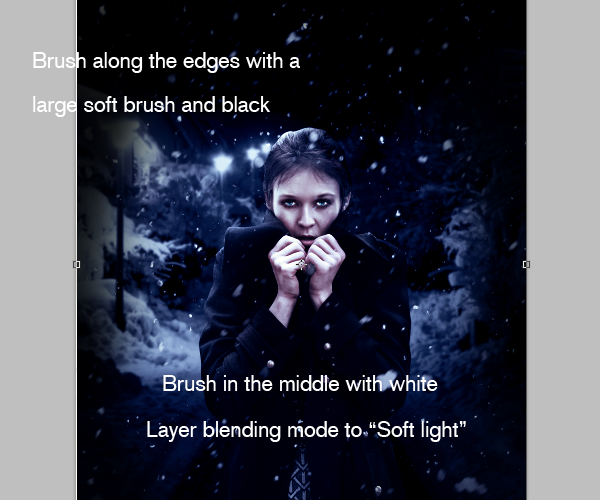
Create a new layer on top of the Snow,the model and the background and select a very large round brush 0% hardness and 15%opacity with Black as your foreground color.Brush over the edges of the whole image to make the focus on the center,then Create a new layer on top of that one and change its layer blending mode to "Soft Light" and brush now in the middle of the image,this time with color white:
Step 30
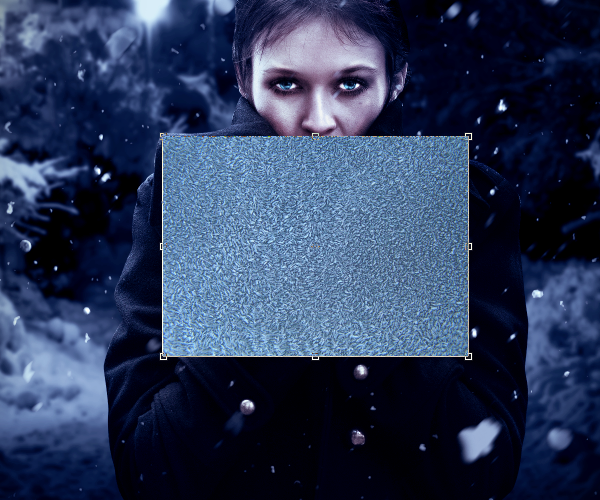
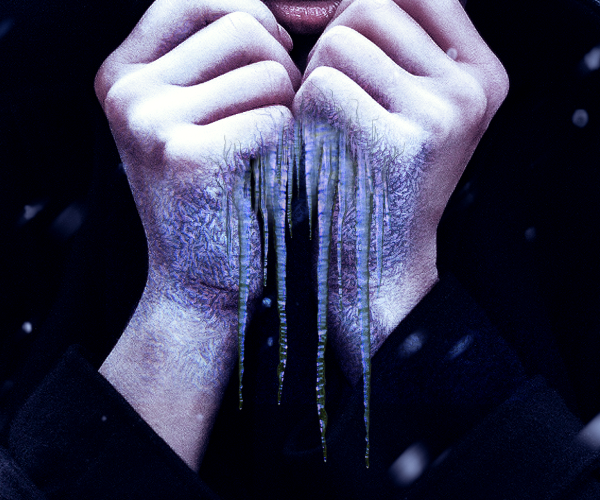
Take the frost texture an drag it inside your document.Resize it to cover the hands of the girl. Then change its layer blending mode to "Overlay".Place all this layers of ice on top of the "Adjustments" group so this layers don't get affected by them.
Step 31
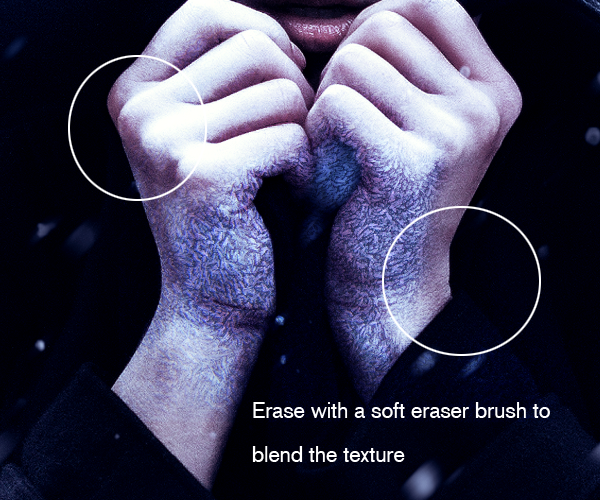
Using the eraser tool (or you can add a layer mask) erase the edges of the frost texture so it only covers part of the hands. Use a soft brush with low opacity for blending:
Step 32
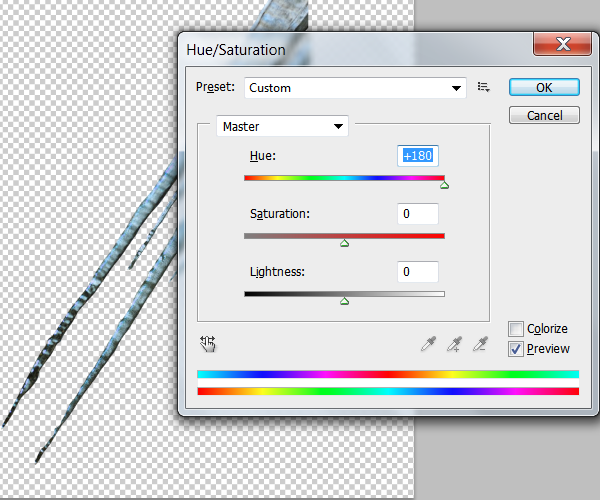
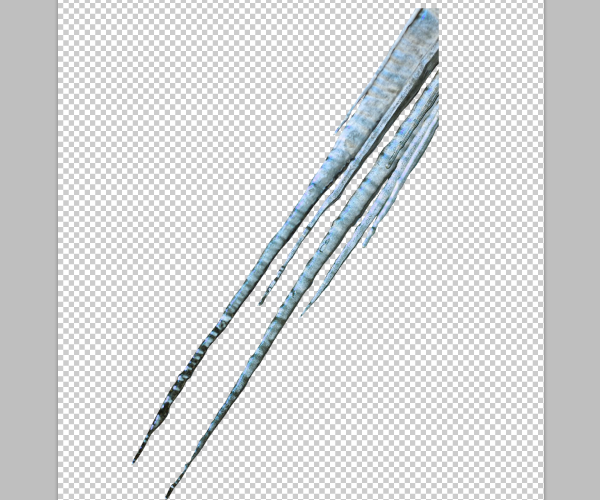
Drag the Icicle stock image to Photoshop and extract it from the background the same way we did with the model.Try to keep as much detail as possible.Then Bring up the Hue and Saturation menu and apply the next settings to give the Icicle a bluer hue:

Step 33
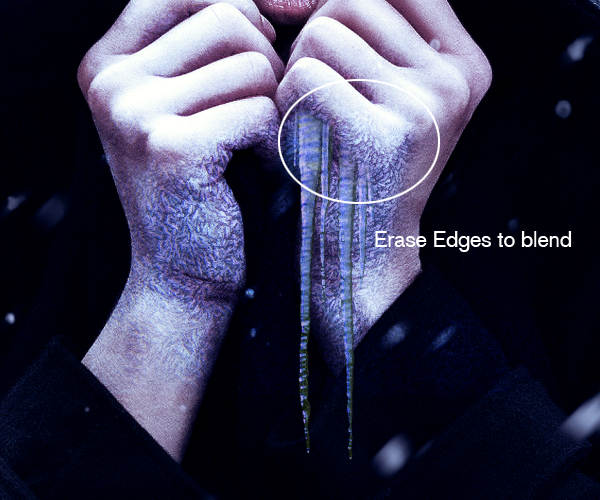
Drag the icicle to your working document ,resize it and place it over the hands.Erase the edges with a soft brush to blend with the frost texture and lower its layer opacity to 85% to make the effect of translucent ice:
Step 34
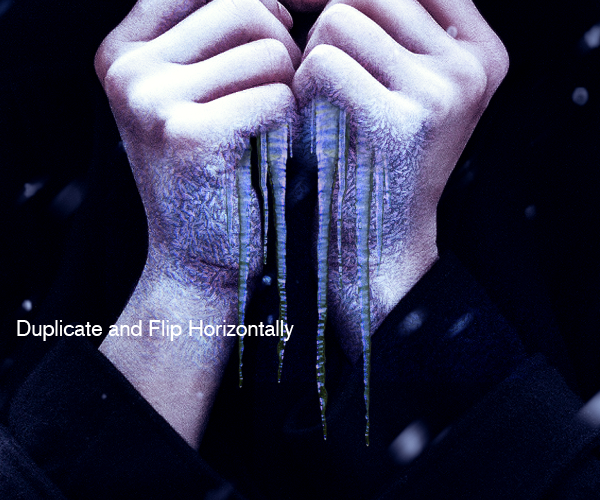
Now duplicate the icicle layer and Flip it Horizontally,resize it and place it on the other side of the hands:

Step 35
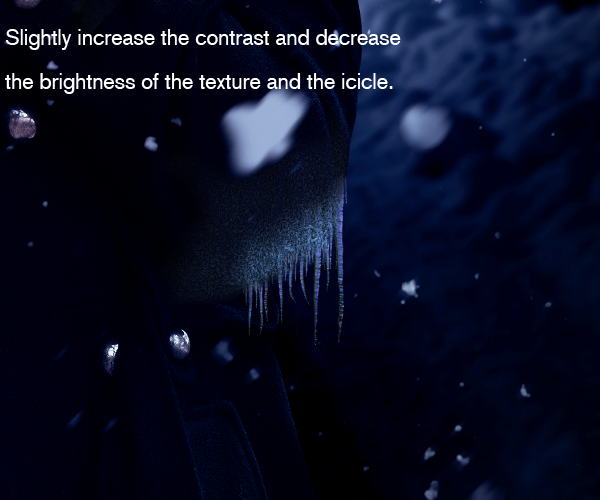
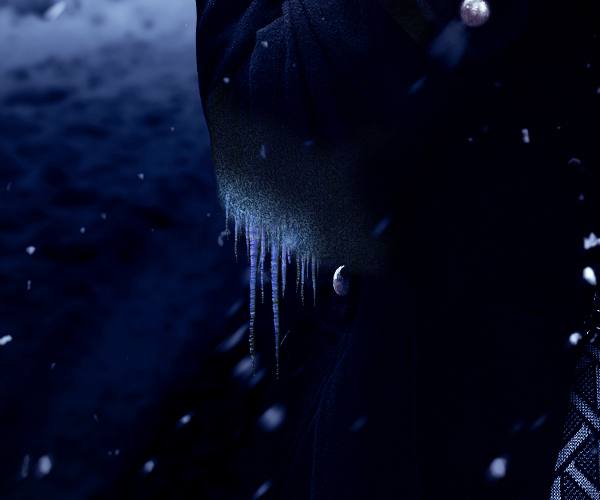
Remember to create new groups to put this layers inside. Now do the same as we did with the frost texture and the icicles on the lower part of the coat.Duplicate the frost texture and place it on top of the part you want to cover,only this time do not change the layer blending mode because otherwise it will be too dark to see and then blend it with a soft eraser.Also duplicate ,resize and position the icicles many times around the frost texture.Increase a little bit the Contrast and decrease the brightness of the textures to blend them with the coat:

Step 36
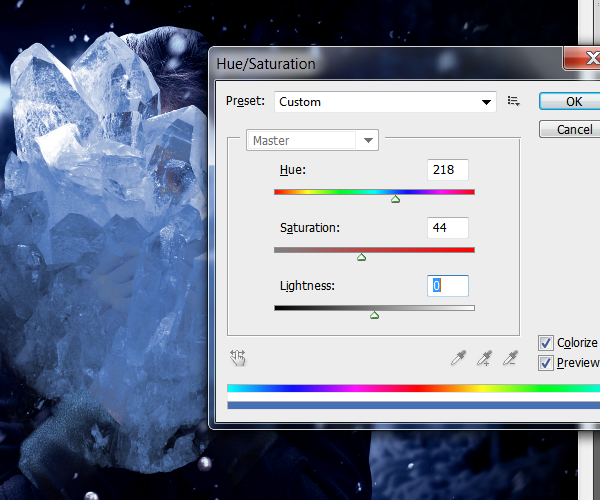
Take the crystal image,drag it into Photoshop and extract it from it's background like we did before. Bring the Hue and Saturation menu and apply the next setting to give the crystals a matching blue hue:
Step 37
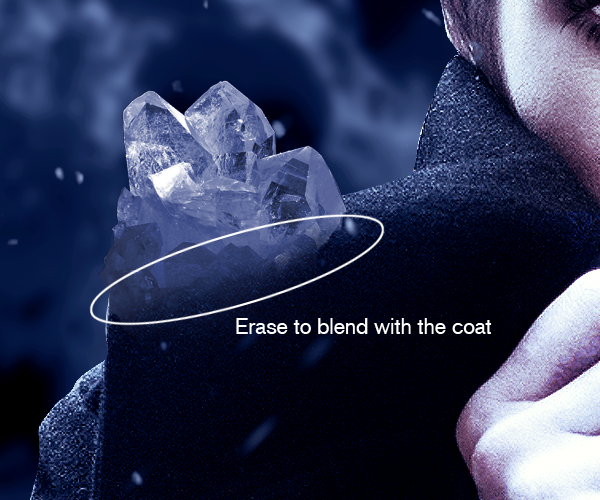
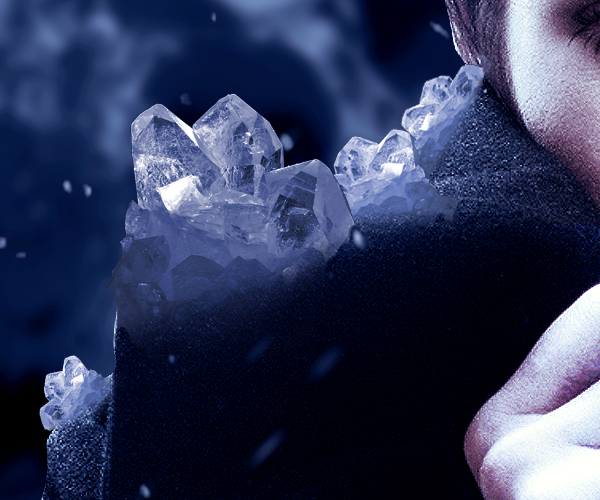
Resize the crystal and place it on the coat.Duplicate this layer as needed to fill the edges:

Step 38
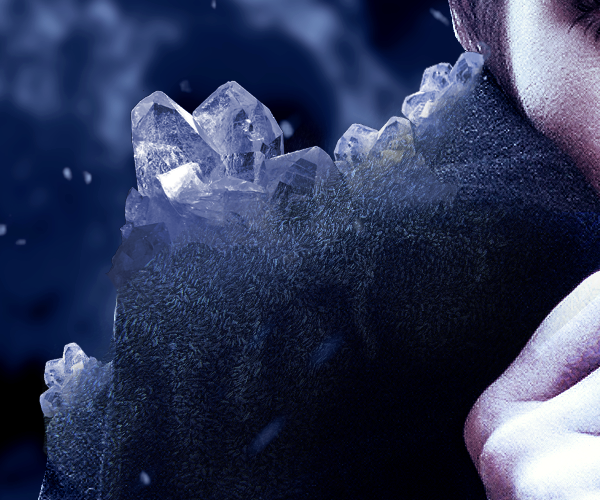
Take the frost texture and place it on top of the crystals and erase with a soft eraser brush to blend:
Step 39
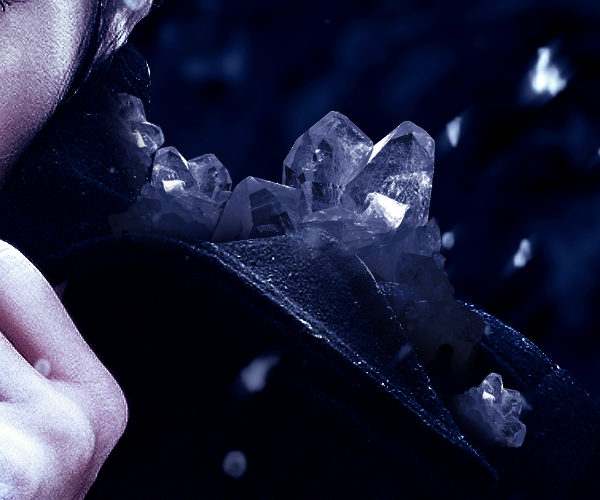
Repeat the same for the other side.You may want to decrease again the Brightness and increase the Contrast on this side to match the light on the composition.
Step 40
Duplicate a couple more times the frost texture and blend on some parts of the coat like the sleeves:
Step 41
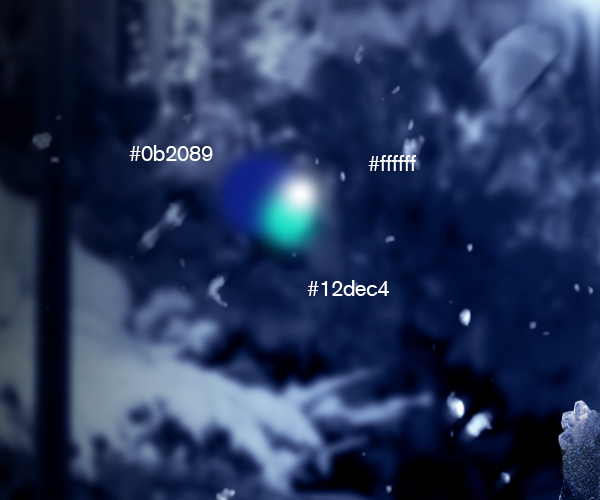
For the last touches we are going to create some nice flares to finish off our manipulation.Create a new layer on top of all the other layers and take the brush tool.Select a 100 pixel round brush with 0%hardness and 100%opacity.Now select two contrasting shades of blue (#0b2089,#12dec4) and paint two little circles with this colors and one little white:
Step 42
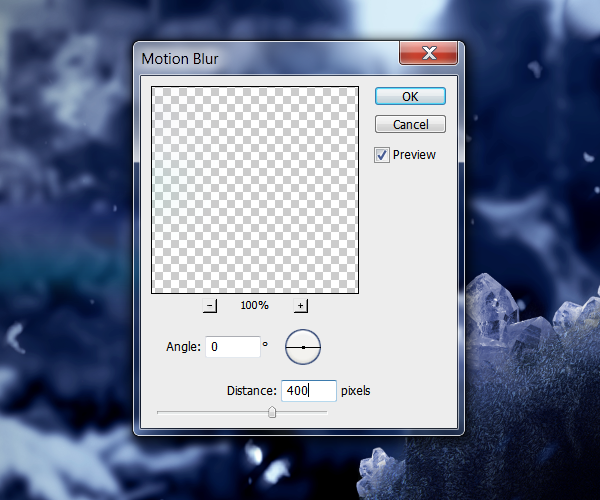
Go to the menu Filter>Blur>Motion blur and apply the next settings:
Step 43
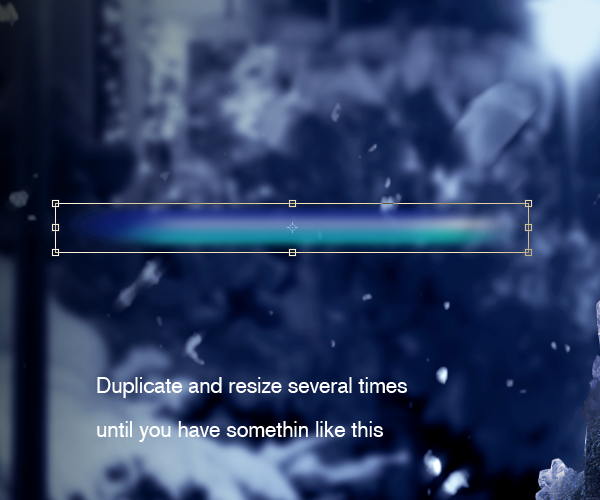
Now duplicate this layer about 5 times or until you get something like this and merge them (Ctrl+E):
Step 44
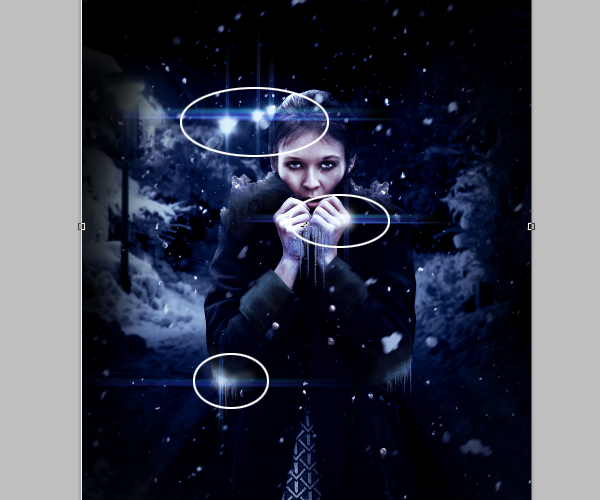
Apply a motion blur once again and change the layer blending mode to "Screen". Then go to the menu Filter>Sharpen>Sharpen and apply it 3 times. Shrink the flare a little bit and duplicate it 3 times.Place the duplicated flares on the brightest spots of the image (Lamps and ice reflections)
Step 45
Duplicate again and rotate them 90° and arrange to for crosses where the light meets the flare:
Step 46
Create a new layer and take a soft round brush of about 100 pixels wide and 70% opacity.With color white paint little hints of light on the crosses of the flares:
Final Results
![final_results[1] final_results[1]](http://photoshoptutorials.ws/images/stories/212624bf5e9e_B250/final_results1.jpg)

No comments:
Post a Comment