
1. Changing Photoshop’s interface color
There’s an entirely new dark color theme for Photoshop and it matches other Adobe products such as Lightroom, After Effects, etc. If you want to change the color theme you can press Shift+F1 to darken or Shift+F2 to lighten.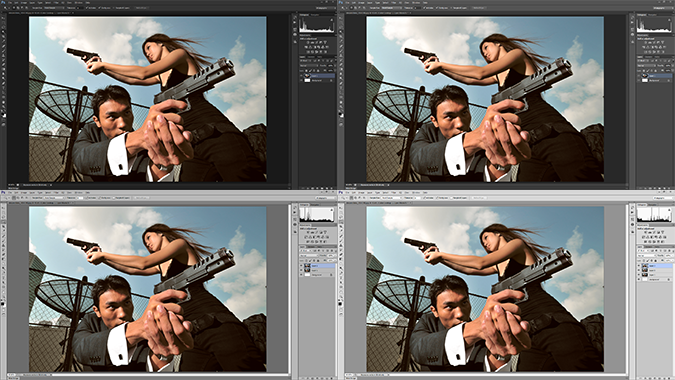
The four new color themes in Photoshop CS6
You can also set the color theme in the preferences by going to Edit > Preferences > Interface (Windows) or Photoshop > Preferences > Interface (Mac).
2. How Background Save and Auto Save Works
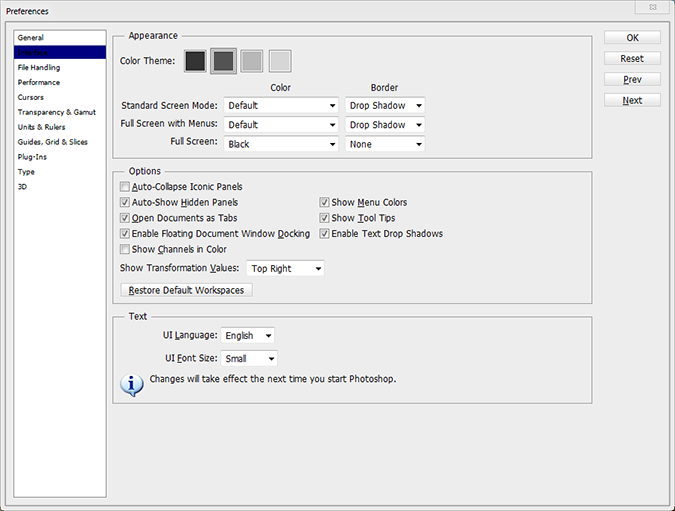
Have you ever had Photoshop crash on you? You’ll be happy to hear about Photoshop’s new auto save feature which saves a backup copy every 5-60 minutes.
Photoshop crashed? Run it again and you’ll find your recovered documents.
You can set the auto save setting by going to Edit > Preferences > File Handling (Windows) or Photoshop > Preferences > File Handling (Mac)
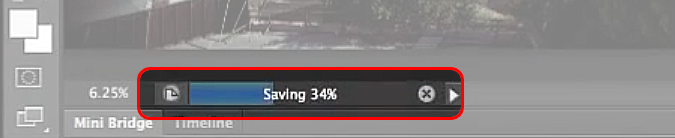
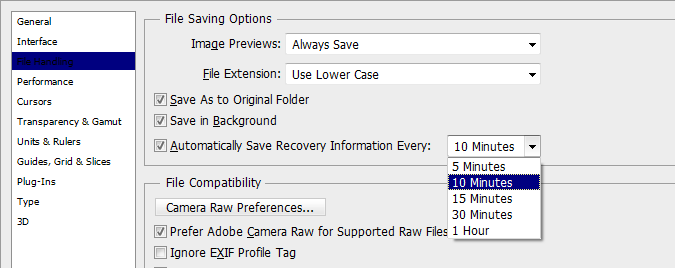
A new save progress bar appears when saving large files.
3. Searching for layers in your 100-layers PSD
A lot of time can be wasted trying to find the right layer to edit. In Photoshop CS6, the Layers palette has been revamped with a new filter menu. Now you can sort and find your layers using different layer properties. To turn filtering off, just press the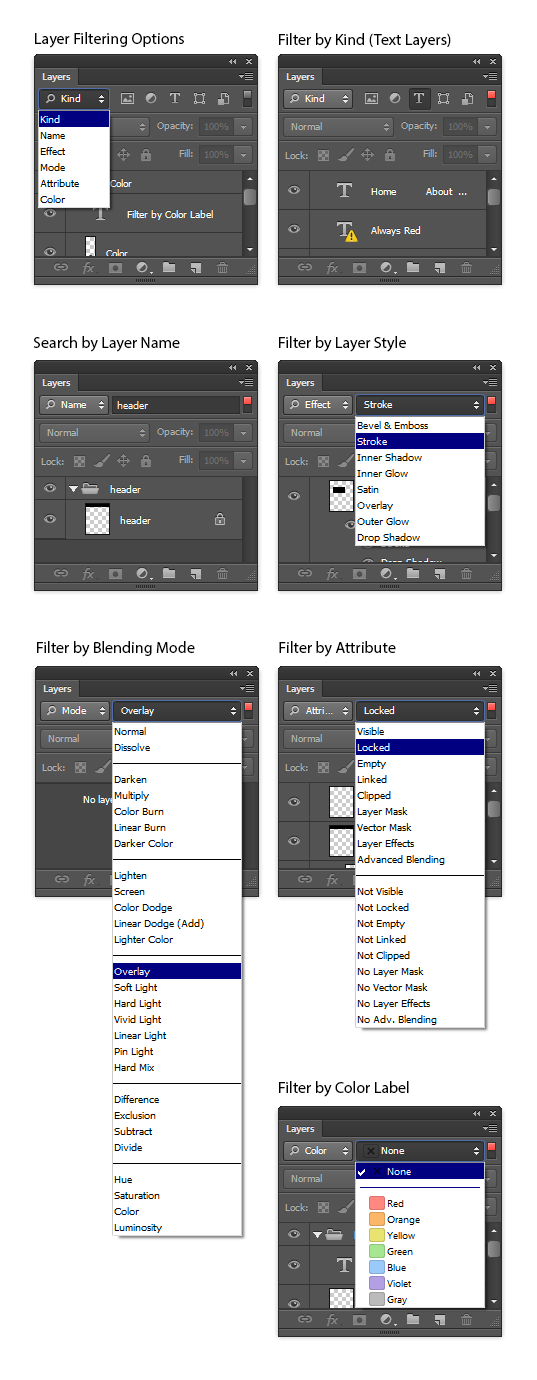
Working on a PSD with 100 layers is less of a headache now thanks to Photoshop CS6’s new layer filtering tool
4. Editing multiple layers at a time
Photoshop CS6 fixes some bugs and adds some enhancements with editing multiple layers. First of all, the Ctrl/Cmd+J hotkey to duplicate layers now work with multiple layers. You can also change blending modes, locking modes, opacity, and apply color labels to multiple layers at a time.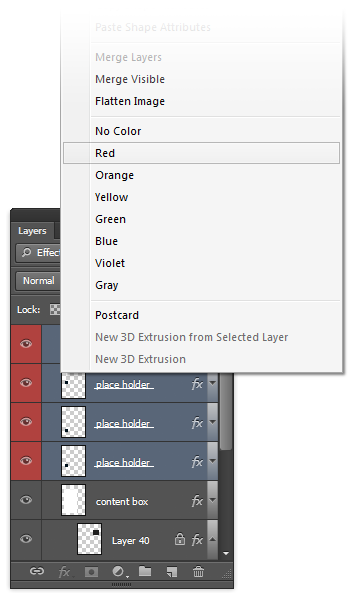
Applying color labels to multiple layers at a time
5. Fix for the Magic Wand Tool
Before, many Photoshop users could not figure out why their Magic Wand tool wasn’t working properly. There was a bug where if you changed the sample size setting in your Eyedropper tool, it would change it for the Magic Wand tool too – and you can’t change it back with the Magic Wand tool. This has been fixed in CS6 by introducing the sample size menu into the Magic Wand options bar.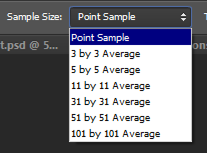
6. Making Selections Better in Photoshop CS6
Want to retouch skin? The improved Color Range selection tool (Select > Color Range) lets you do this easier with skin tone and face detection! Just set the mode to Skin Tones and enable Detect Faces and Photoshop will create a pretty good selection of the skin.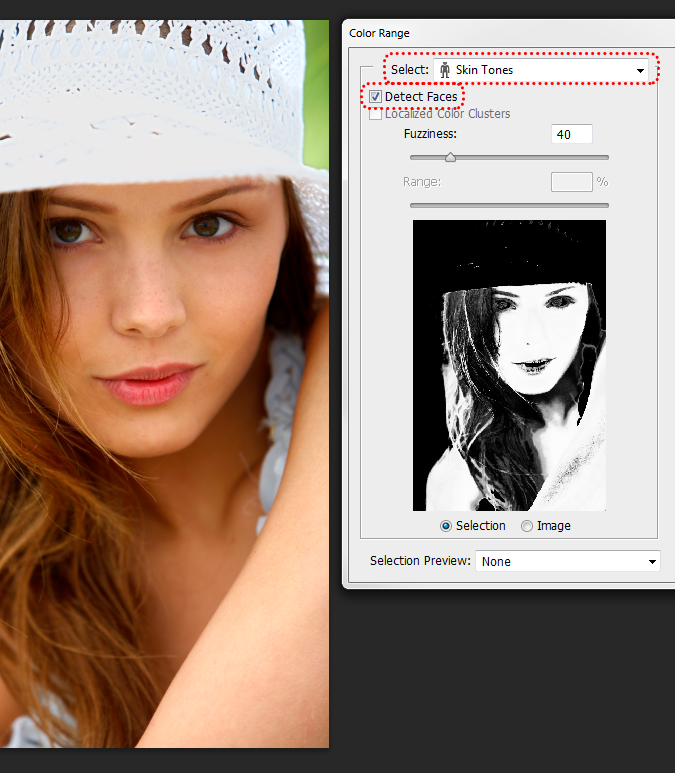
7. Using the new Crop tools
The Crop tool in CS6 can be a little confusing when you first use it. Adobe took the Crop tool from Lightroom and put it in Photoshop. First of all, it’ll automatically create a crop selection of the entire image when you select the Crop tool. To move the crop area, pan the image instead of the crop selection (as if you were moving a piece of paper).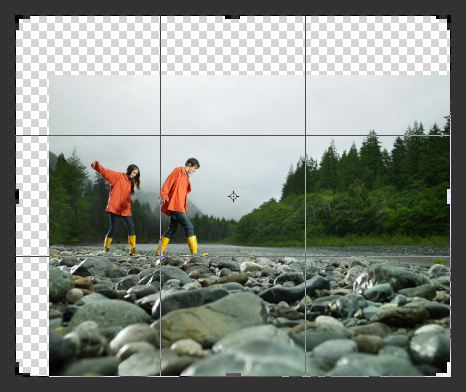
The new crop tool shows you a preview of your background if you extend the crop area beyond your image boundaries.
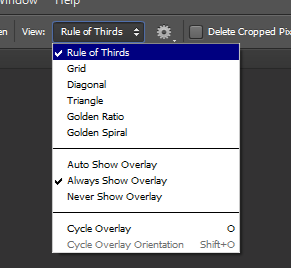
The new crop views
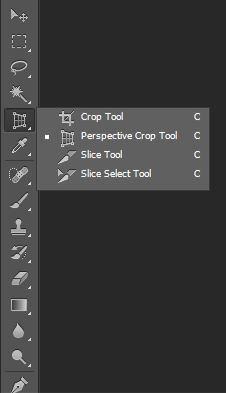
The Perspective Crop tool
8. Eyedropper tool enhancements
The new sample modes for the Eyedropper tool lets you ignore adjustment layers and sample from the current layer and below. Also changed is the sample size option – it doesn’t affect the Magic Wand tool anymore.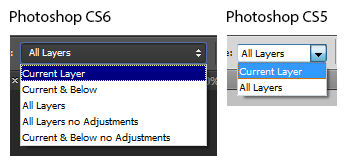
The new sampling modes
9. Using the Patch Tool on Content-Aware mode
The Patch tool isn’t new but what is is a new Content-Aware mode for the Patch tool. Content-Aware fill worked great for removing objects and selecting areas to copy the background from. With the Patch tool on Content-Aware mode, you can specify where Photoshop should sample the background from so that you get better object removals.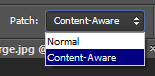
You can change the patch mode in the options bar

Not getting the results you like? Try changing the adaptation setting.
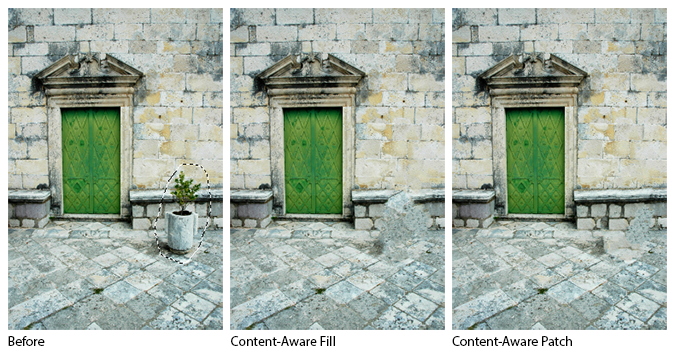
The Content-Aware Patch tool can get results closer to perfect
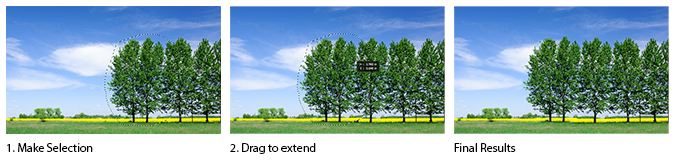
10. Using the new Content-Aware Move tool to move and extend objects
The Content-Aware Move tool lets you move objects easily using content-aware technology. It works wonderfully when moving objects with a simple background but not perfectly for more complicated scenes like the one below.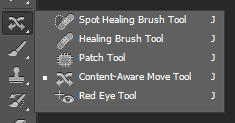
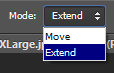
The Content-Aware Move tool
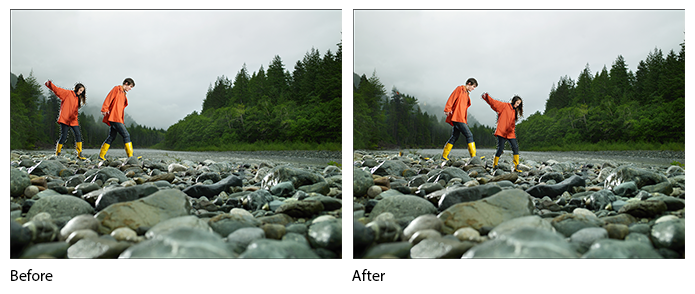
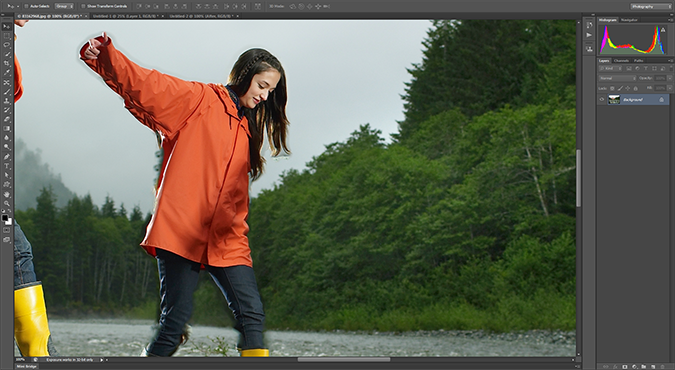
Photoshop did most of the work but more clone/heal work needs to be done for this image.
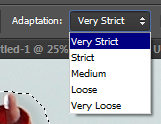
Not getting good results? Try adjusting the Adaptation level.
11. Using the updated Brush tool
Digital painters will love the new Brush tool. Photoshop CS6 introduces two new brush features: erodible tip and airbrush tip. Erodible brush settings let you draw lines with a tip that erodes like a crayon (from thin to thick lines). This lets you create paintings that look more realistic. Airbrush tips should be used with a pen tablet instead of a mouse and it lets you use your pen just like an airbrush – press harder to create a thinner line or lighter for a thicker line with more splatter. It can also detect the angle of your pen to control the direction of the spray - you'll need a tablet with tilt-sensitivity for this feature to work (ex. Wacom Intuos5).The brush tool itself has been improved with a max brush size of 5000 px (compared to 2500 px) and rich cursor support. The rich cursor support lets you change your brush size and hardness dynamically simply by dragging your mouse (Alt+Right drag or Ctrl+Opt+Drag on Mac).
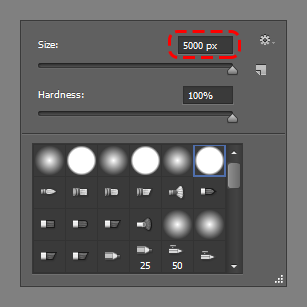
The max brush size has been increased from 2500 to 5000 pixels.
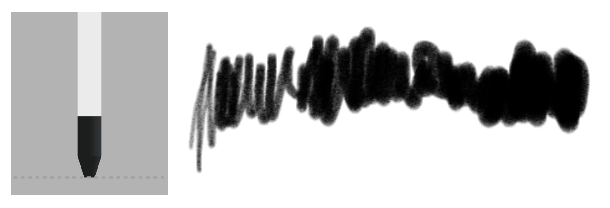
Erodible tip dulls the tip of your brush for realistic painting results
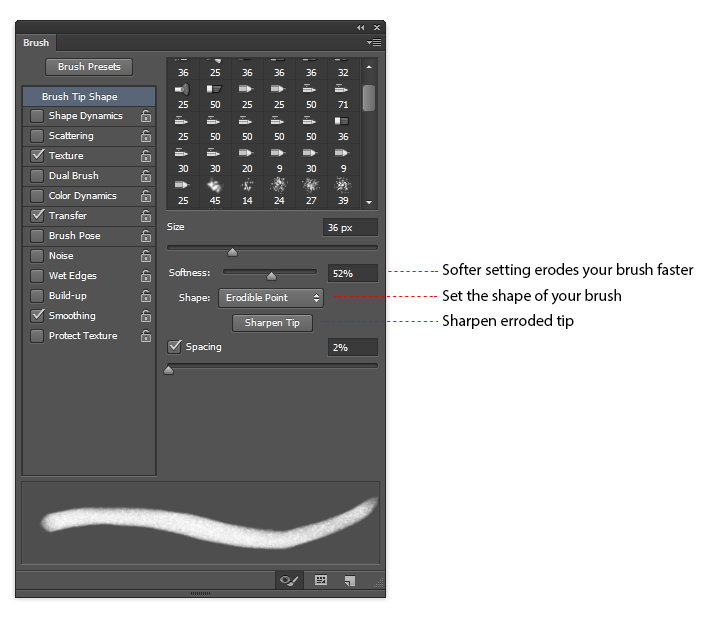
The new erodible brush settings can be found in the Brush palette (Window > Brush).
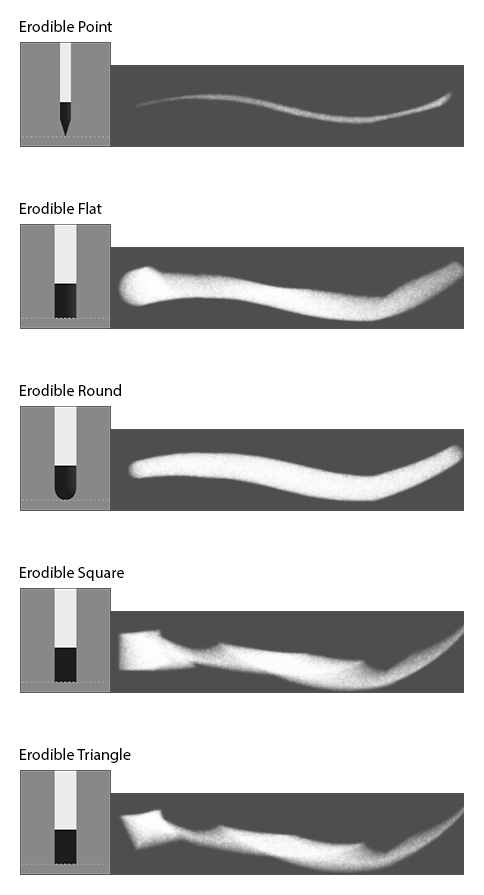
Comparison of the 5 erodible brush tips
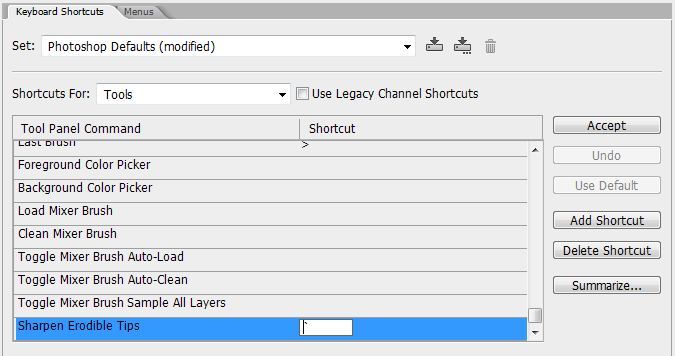
If you use Erodible brushes, you should set a hotkey to sharpen the tip. You can access this window by going to Edit > Keyboard Shortcuts. The tool is located at the very bottom of the Tools list.
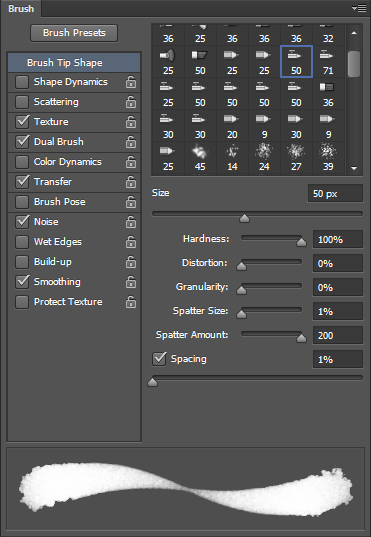
The airbrush settings
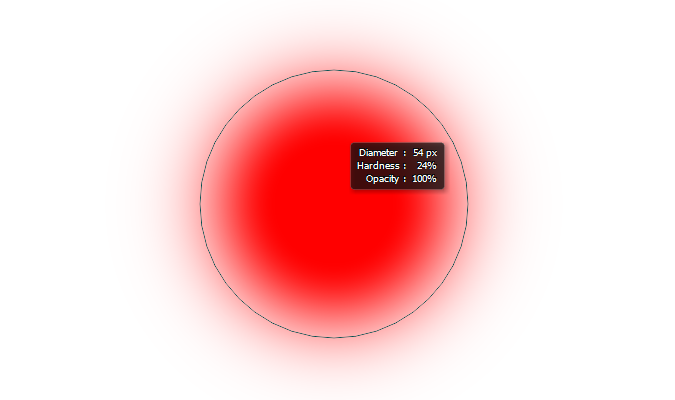
Hold down the Alt/Option key then right-drag anywhere in your document to bring up the live brush settings. You can also hold the Ctrl + Option key and left-drag on a Mac. Drag horizontally to adjust the brush size and vertically to adjust the hardness.
12. Using the improved Gradient fills
Whether you’re doing it via the Gradient tool, layer styles, or Gradient Fill layers, you will like the new scale option that lets you scale up to 1000% (up from 150%).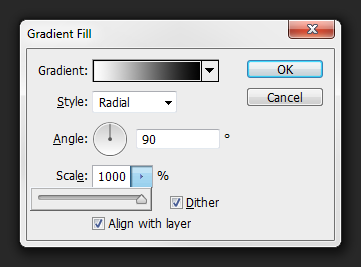
Scale gradients up to 1000% (compared to 150% in CS5)
13. Using the new Text features
There’s so many features with the Type tool that Photoshop CS6 now has a new Type menu. One awesome feature designers love is the Lorem Ipsum text generator. For those who don’t know, Lorem Ipsum is placeholder/filler text you can use instead of typing in random text. The new Character Styles and Paragraph Styles palettes let you create your own typography presets.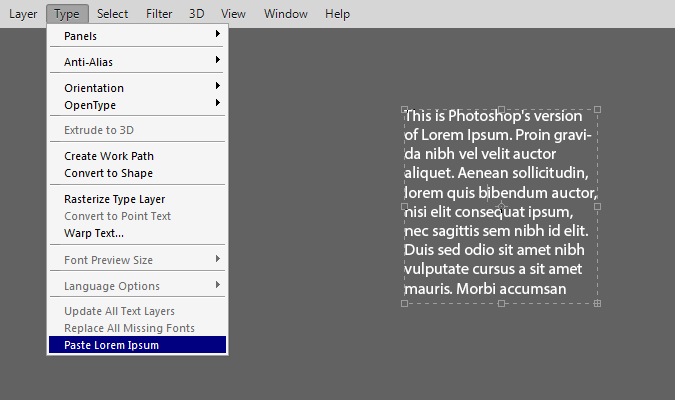
With the Text tool, draw a text box then go to Type > Paste Lorem Ipsum.
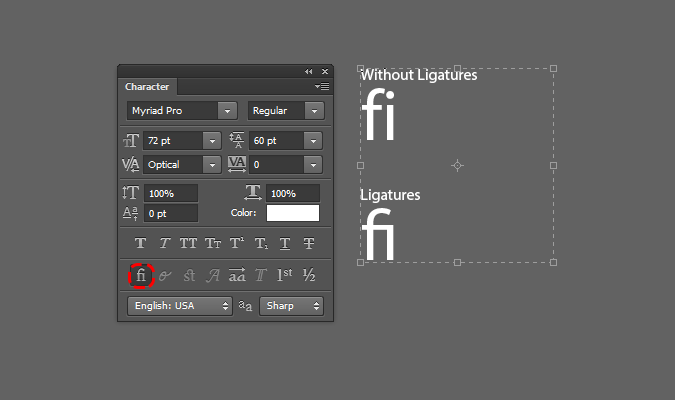
OpenType features are now built into the Character palette. In CS5, these were hidden inside the flyout menu.
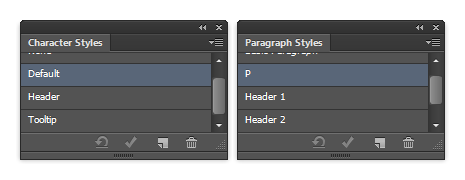
Use the new Character Styles and Paragraph Styles palettes (Window > Character Styles/Paragraph Styles) to create text and paragraph presets.
 t
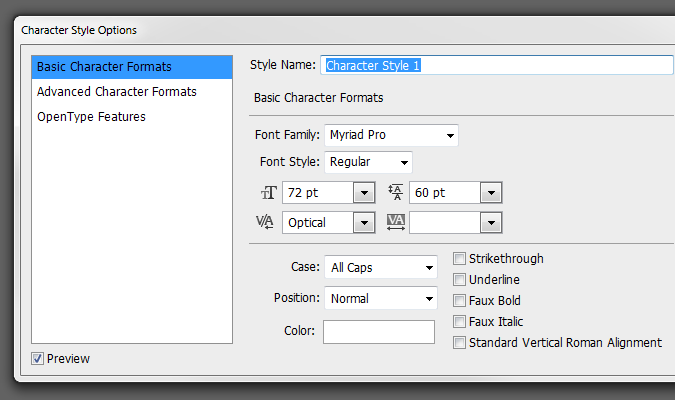
t Character Style Options
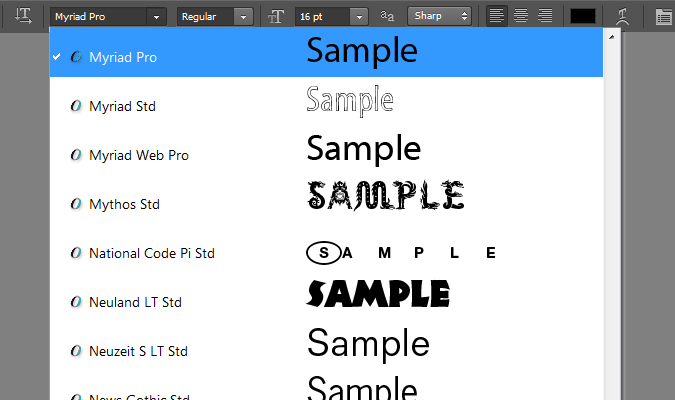
You can change the font preview size by going to the Type > Font Preview Size menu.
14. Making adjustments with the Adjustments and Properties palettes
In Photoshop CS5, you would change an adjustments settings in the Adjustments panel (Window > Adjustments). CS6 has a new panel for this called Properties (Window > Properties). Inside the Properties panel is a new Masks tab where you can adjust the layer mask.
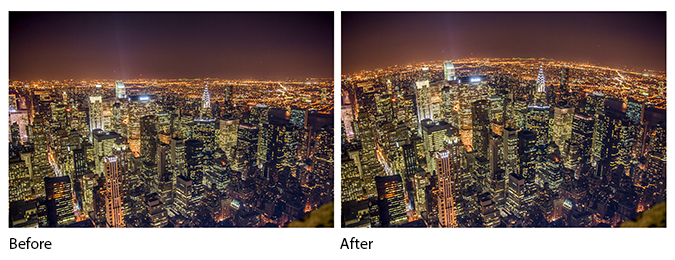
The New “Enhance Brightness and Contrast” Auto Adjustment
There’s a new auto button in the Brightness/Contrast, Levels, and Curves adjustments and it works differently. Originally, it would adjust the contrast for each channel (red, green, and blue). In Photoshop CS6, it enhances the brightness and contrast and for more stable color results. It’s also easier to make adjustments afterwards because you can modify the black and white points without having to go into each channel.
The new “Enhance Brightness and Contrast” auto adjustment mode in Photoshop CS6 produces stabler color results
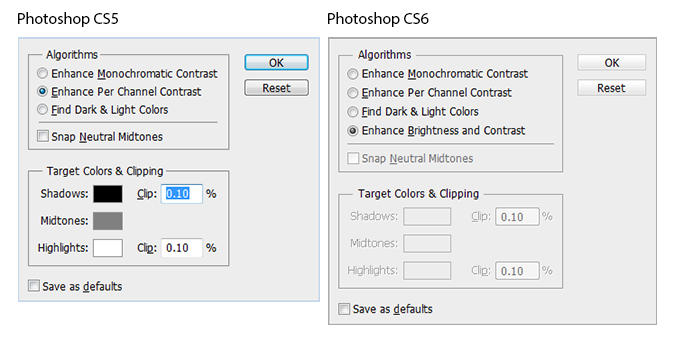
The new auto adjustment algorithm in CS6
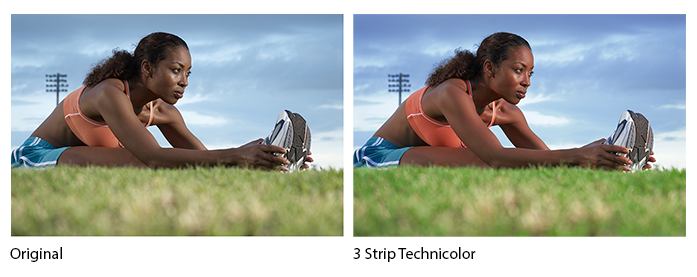
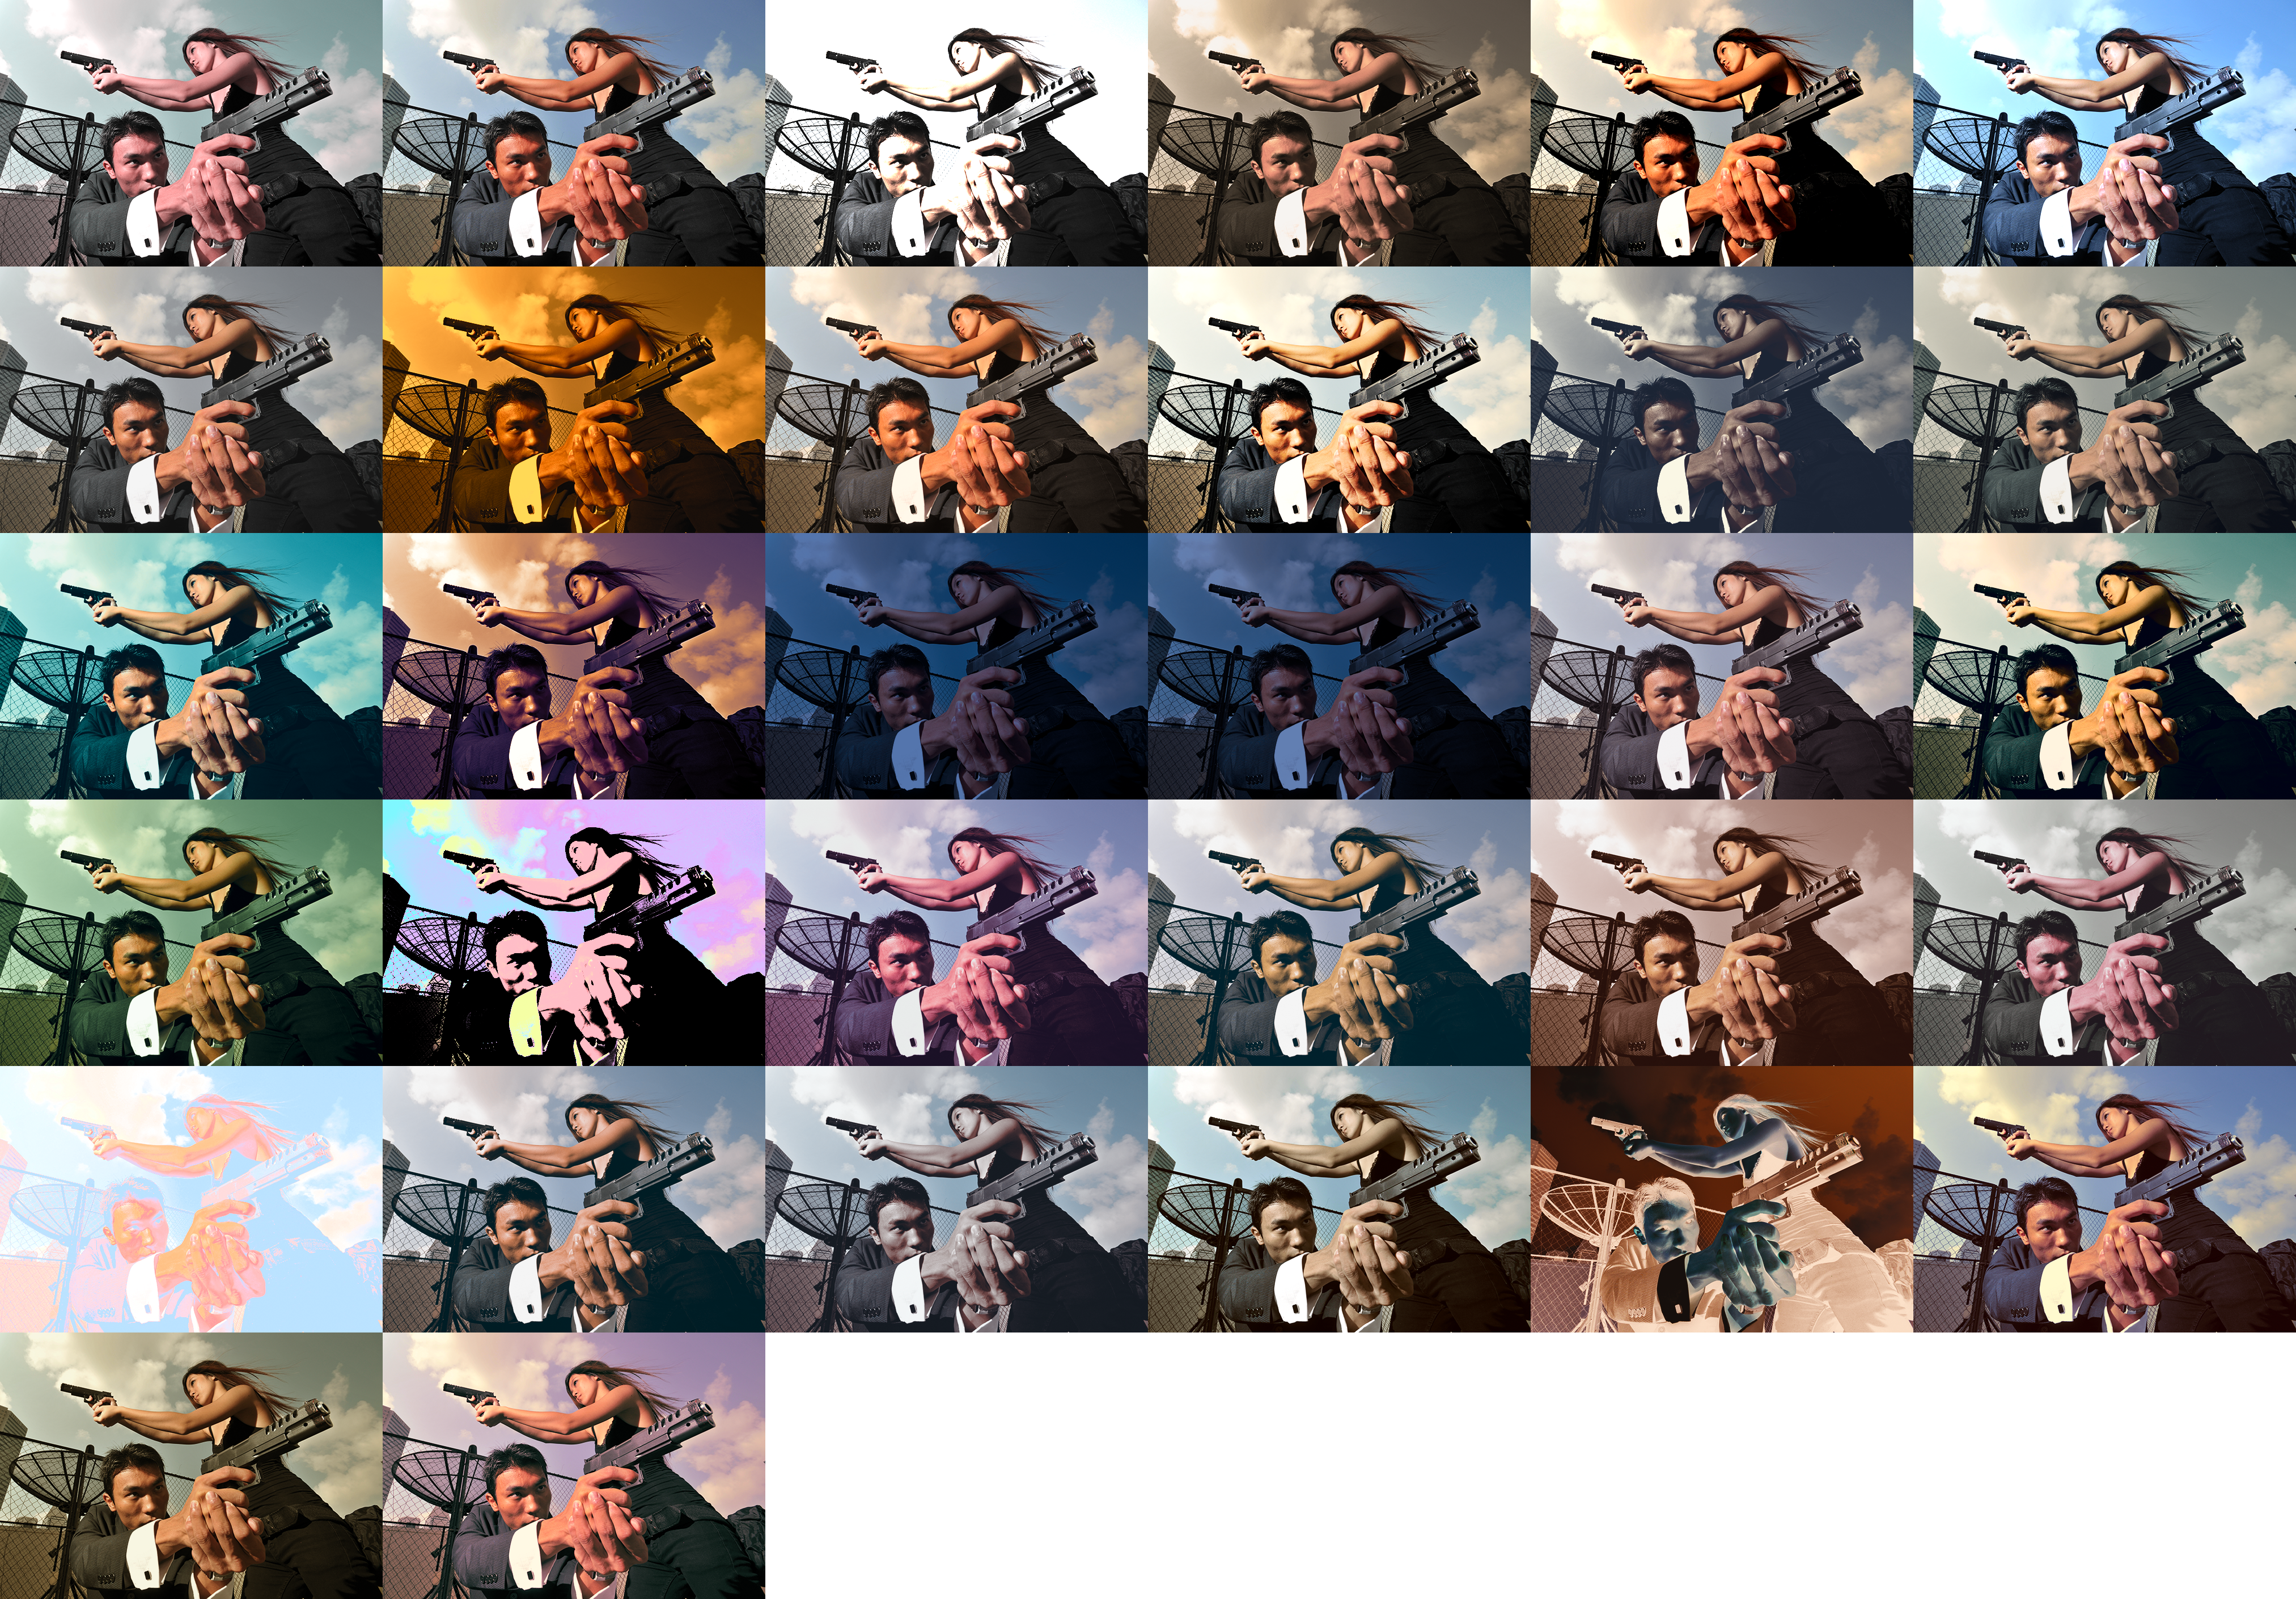
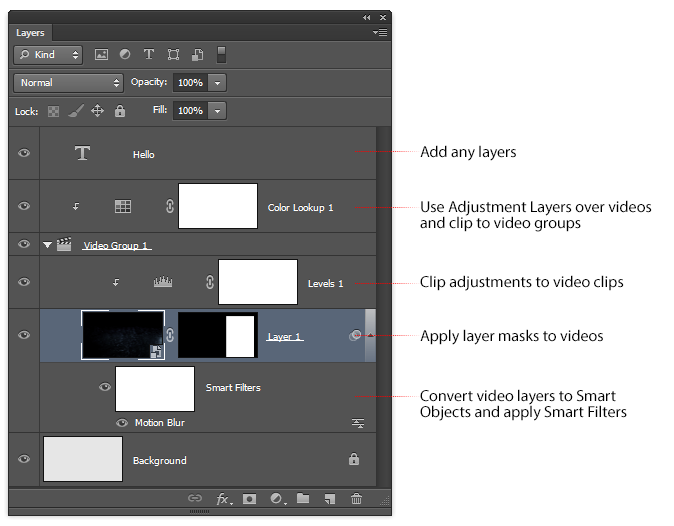
15. What’s the new Color Lookup adjustment for?
Photoshop CS6 has a new adjustment you can apply to your photos and it’s one photographers would love. The Color Lookup adjustment lets you apply color profiles used in video editing and apply them to your Photoshop document. These adjustments can be used to simulate the color of films, monitors, and other devices. It looks pretty technical at first glance but when you click on the drop-down menus, you’ll find that Photoshop comes with many color presets it’s easy to use.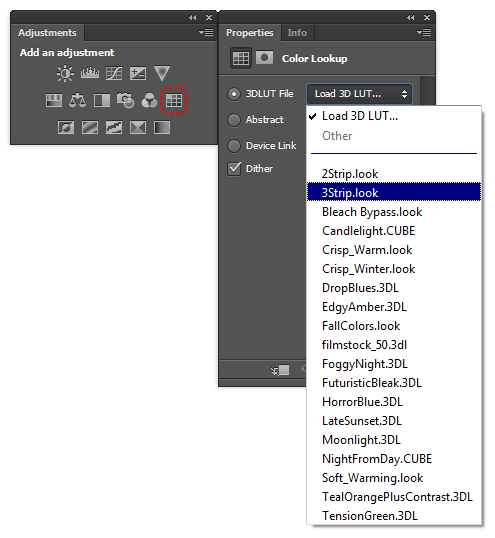
16. Editing RAW files in the new and spectacular Camera RAW 7
Photoshop CS6 uses the same Camera RAW found in Lightroom 4 and it simply works better. There is a new process for adjusting images which makes more sense – you simply work from top to bottom. Adjustments also give better results and more room for recovery.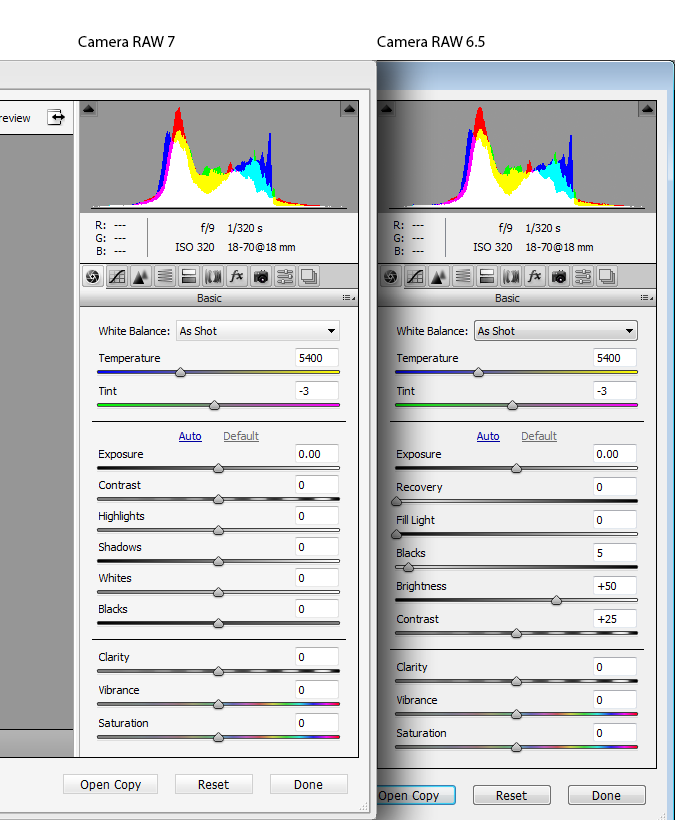
The new workflow lets you work from top to bottom. Also note that the values all start with 0.

Camera RAW 7 performs significantly better auto adjustments than Camera RAW 6.5.
17. Fixing wide angle/fisheye photos with the new Adaptive Wide Angle filter
Photographers now have more control over their photos with this new filter that corrects distortions. Firstly, it works as a Smart Filter which means you can convert your layer into a Smart Object, apply the filter, then go back and edit the settings at any time. Correcting distortions is amazingly easy and fast. Simply draw lines over straight edges and Photoshop will automatically fix the photo for you. If the photo was taken with a camera and lens that Photoshop has a profile for, it’ll automatically load it and correct the settings for you.If you create a panorama from multiple images with Photoshop, you will be able to use the Panorama correction option which is designed to correct the arches in panoramas. You have to create the panorama with Photoshop’s stitch tool and have all the layers intact for this option to be visible – opening a panorama JPEG file won’t work.
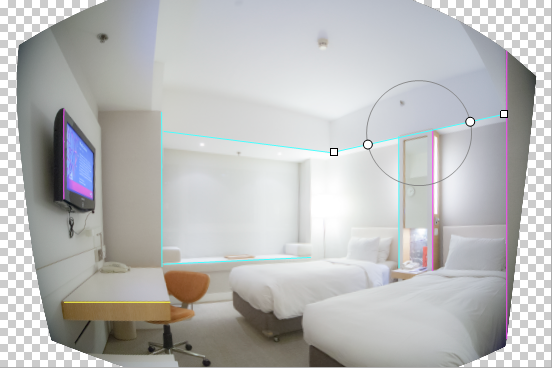
Simply draw lines to straighten edges. Hold the Shift key while drawing to make an edge perfectly horizontal or vertical.
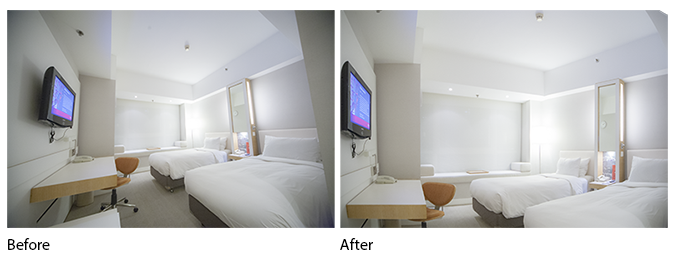
This filter works great for fixing ultra wide angle photos. Slanted and curved lines were straightened in less than 1 minute. It also fixed the perspective of the image (ex. both beds are equal size in the after photo).
18. Using the Liquify tool on gigantic images
The Liquify tool is pretty much the same thing except that it’s now useful for your gigantic 15+ megapixels images. In CS5, liquifying an image isn’t real-time; you have to liquify then wait for Photoshop to render it. Now in CS6, you can liquify an image with no lag. This is possible with the new Mercury Graphics Engine which uses your GPU to do the work. You can even edit using the new max brush size of 15,000 pixels (up from 1500 pixels) without lag.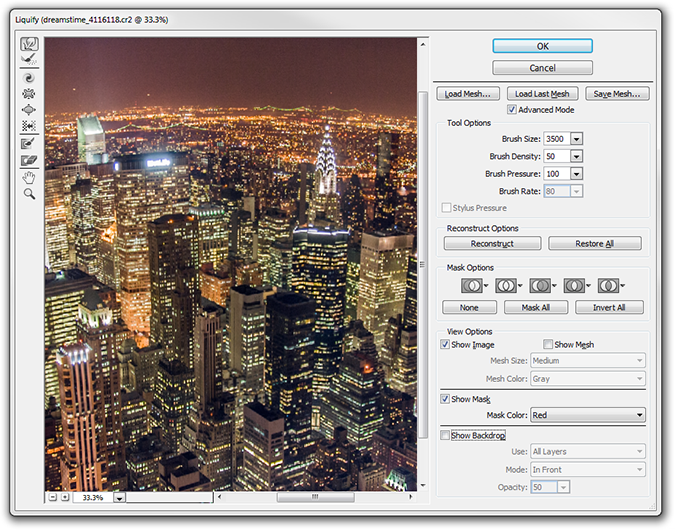
The performance improvement and larger brush sizes makes it easier to liquify high-res images.
Using the larger brush sizes, you can create curved horizons on high-res photos.
19. Turning photos into oil paintings in seconds
This new artistic filter lets you easily turn photos into oil paintings and it works on Smart Objects. Unfortunately, it suffers the same problem that many other artistic filters – the settings don’t scale with the image size. That means that if you are working on a high-res photo, you might not get an effect that is strong enough. The only way around this is to resize your photo down, rasterize the layer (if you are using Smart Filters), then enlarge it back.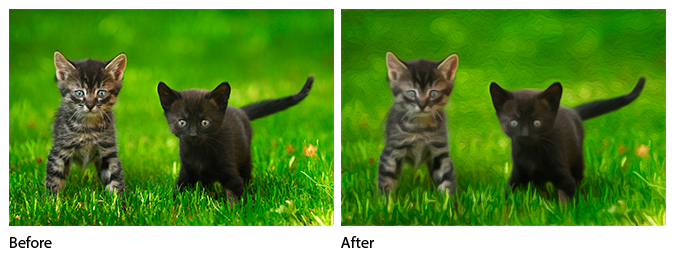
Turn photos to oil paintings in seconds
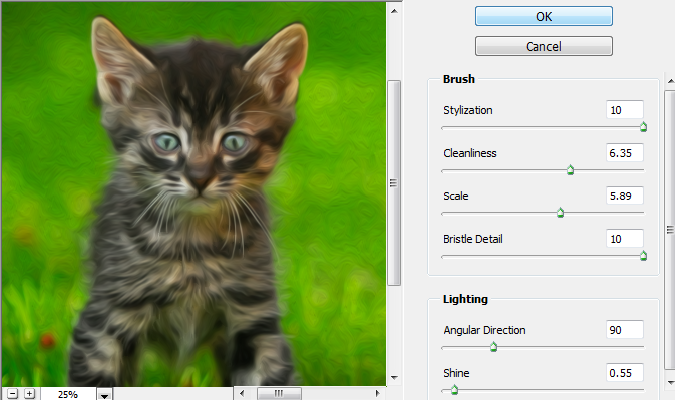
The Oil Paint filter
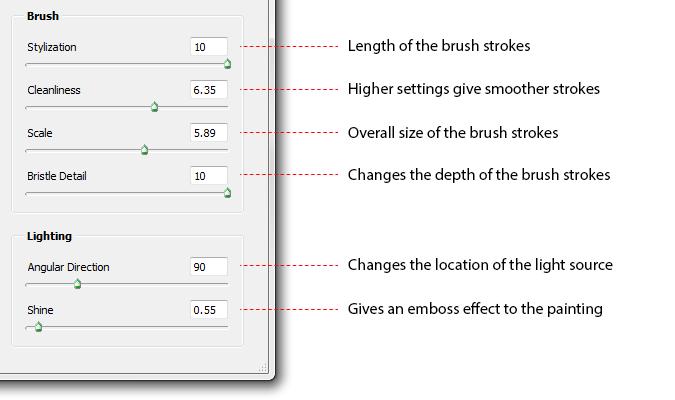
Settings you can adjust to get the look you like
20. Selective blurring with Field Blur, Iris Blur, and Tilt-Shift
Selective blurring has been popular in the last few years and Photoshop CS6 makes it even easier to do selective blurring. Unfortunately, these filters are not available as Smart Filters which means you can’t go back and edit the settings at a later time.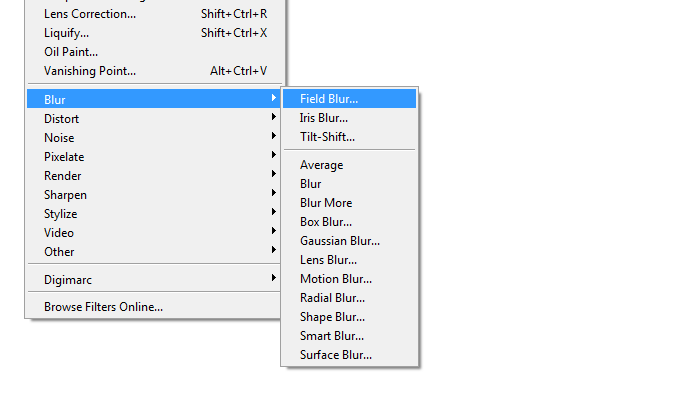
The filters can be found in the Filter > Blur menu.
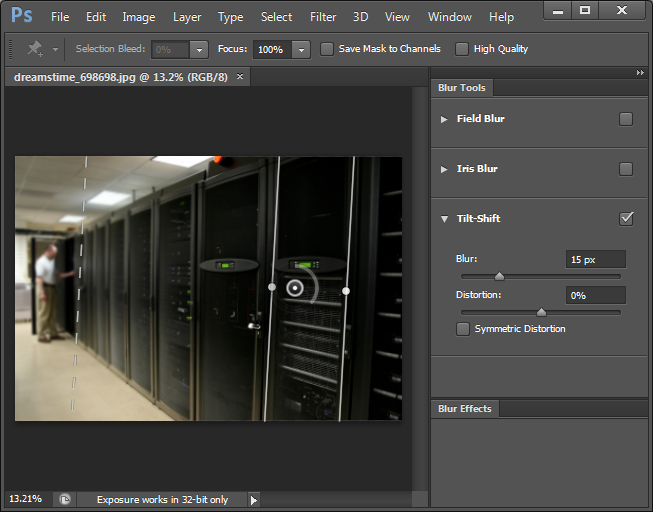
Although the filters are listed as three separate menu items, they appear in one gallery with three different tools.
21. Using the new Lighting Effects filter
Remember in CS5 where you get a tiny preview window for the Lighting Effects filter? Photoshop CS6 threw that away and replaced it with a gigantic preview area that’s accelerated with Photoshop’s new Mercury Graphics Engine.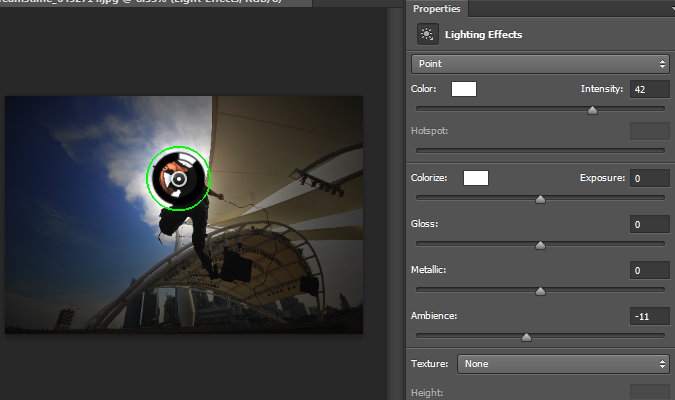
The new Lighting Effects filter in Photoshop CS6
22. Filling with Scripted Patterns
Using the Fill tool (Edit > Fill), you can fill using scripted patterns. These are 5 presets that alter the way you fill patterns. Unfortunately, their usefulness is limited because they don’t offer options for the scripts.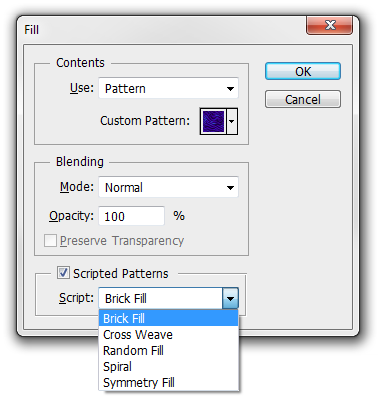
Checkmark the Scripted Patterns option to access the pattern scripts
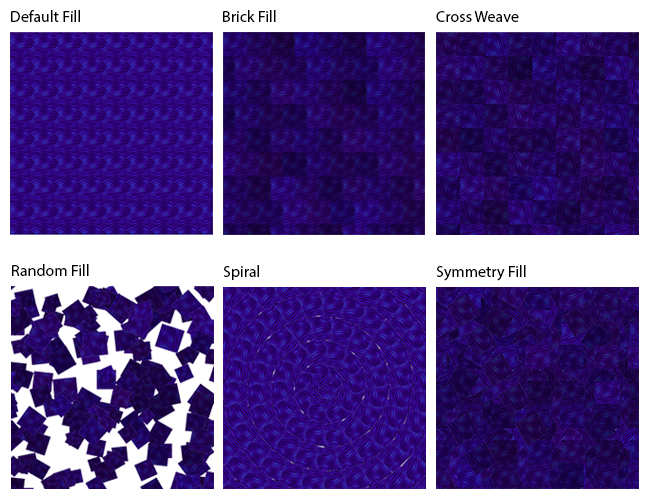
The 5 scripted pattern fills
23. Using groups like layers
Before, to apply clipping masks and layer styles to groups, you’d have to convert the group into a Smart Object. Now you can do this in CS6 without having to convert the group into a Smart Object.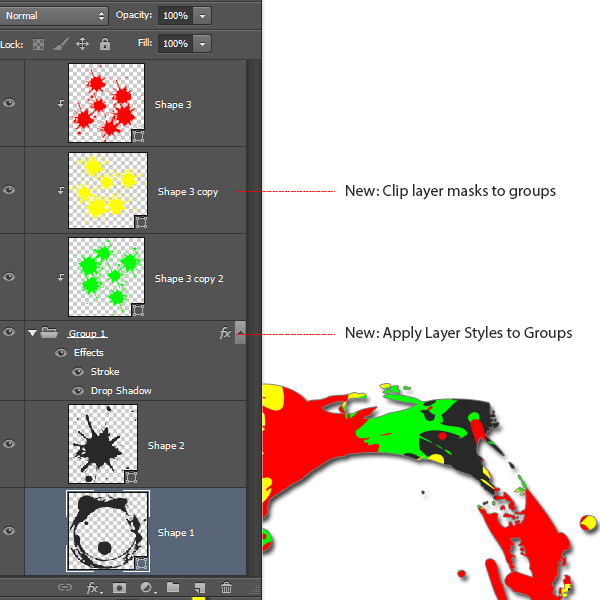
Take advantage of this new feature to keep your layers organized and to a minimum.
24. Working with the new Shape Layers
In Photoshop CS5, shape layers were just a solid color adjustment layer with a vector path. In Photoshop CS6, vector layers are now shape layers and they give you fill and stroke options just like what you would find if you use Adobe Illustrator. You can also have multiple vector shapes inside one vector layer and align, rearrange, and transform (Edit > Transform) the shapes.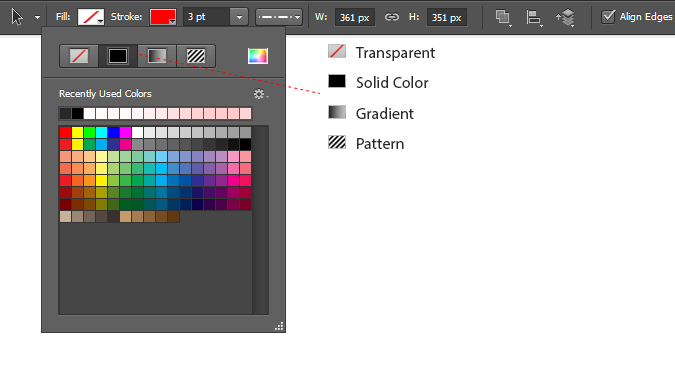
You can set the the fill or stroke to transparent, a solid color, a gradient, or a pattern.
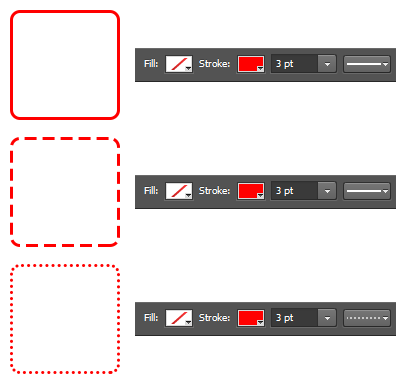
The three default stroke presets lets you create dashed and dotted lines quickly
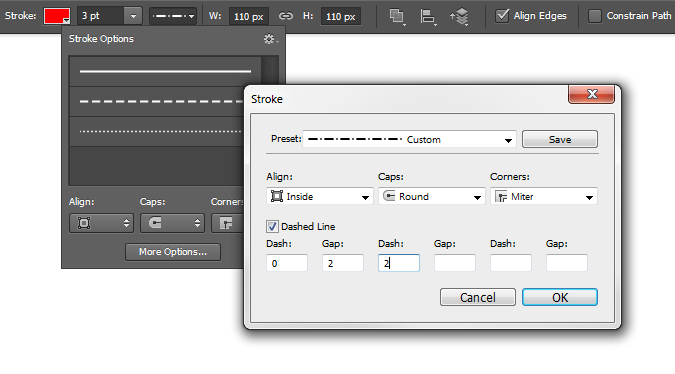
You can even create your own custom stroke by clicking on the “More Options” button.
25. Editing videos in the Timeline panel
Video editing inside Photoshop? It’s true and great news for those of you with video-capable DSLRs! Now you can import videos as Smart Objects and edit them using the Timeline panel. The panel works just like the one found in Adobe Premiere and you can animate objects and apply filters without buying a new software. The new video editing capabilities in Photoshop doesn’t replace Adobe Premiere (Adobe’s video editing software), but it comes close enough that you may never need it. You can arrange clips, apply transitions, and Photoshop effects.Note that Photoshop doesn’t save the videos into the PSD. Instead, it links to them – that means that if you’re sending the file to someone else, you’ll need to send them the video files too.
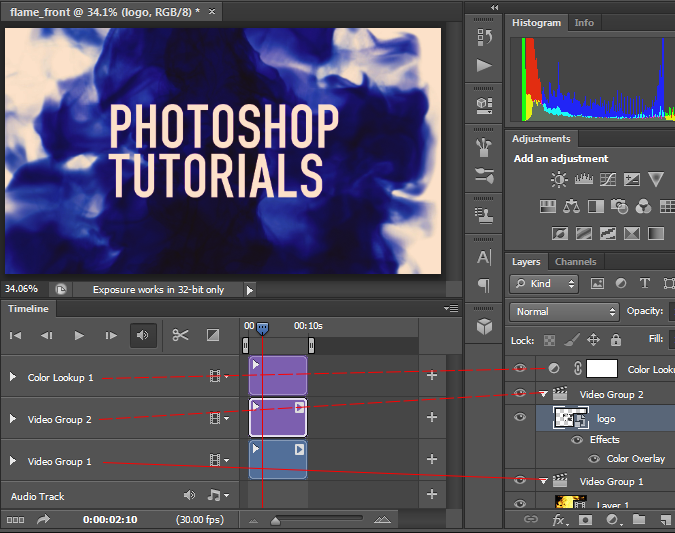
Tracks are linked to layers.
In some ways, video editing in Photoshop is easier than Adobe Premiere.
26. Working with 3D Objects in Photoshop CS6
Working with 3D objects in CS6 is quite different. First of all the Repoussé tool has been replaced (more about this later). Additionally, the UI went through a major overhaul to resemble something more similar to other 3D software.3D performance is significantly improved with the Mercury Graphics Engine – you can make 3D adjustments smoother than you can in CS5. You can even preview shadows and reflections without rendering the scene. Unlike Photoshop CS5 where you could only select and edit one mesh at a time, CS6 will let you edit multiple meshes at a time. This also means you can move multiple meshes at the same time and align them with the Move tool.

Editing 3D Objects in Photoshop CS6
27. Creating Non-Destructive 3D Type
Back in Photoshop CS5, if you wanted to turn 2D text into 3D text, you’d use the Repoussé tool (3D > Repoussé > Edit in Repoussé) which was pretty easy to use. The downside to Repoussé is that it would rasterize your text, i.e., if you spelt something wrong, you can’t fix it without undoing everything. In Photoshop CS6, the Repoussé tool is gone and replaced with the Properties palette (the same Properties palette you use to edit adjustment layers).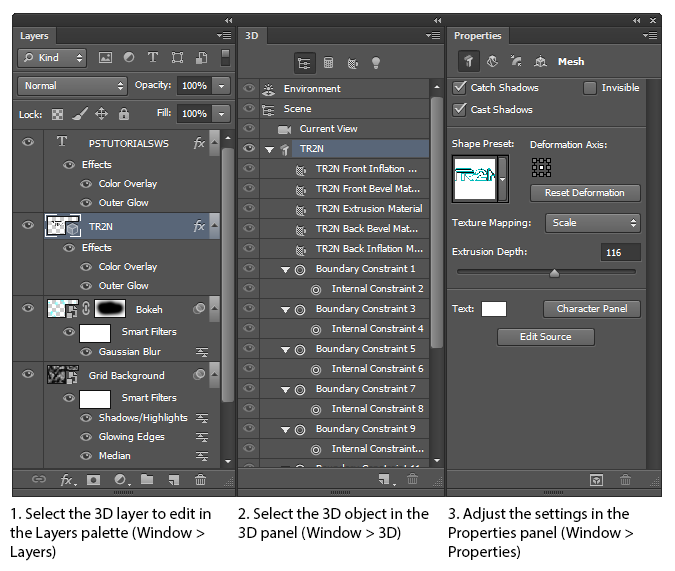
The process for editing 3D objects in Photoshop
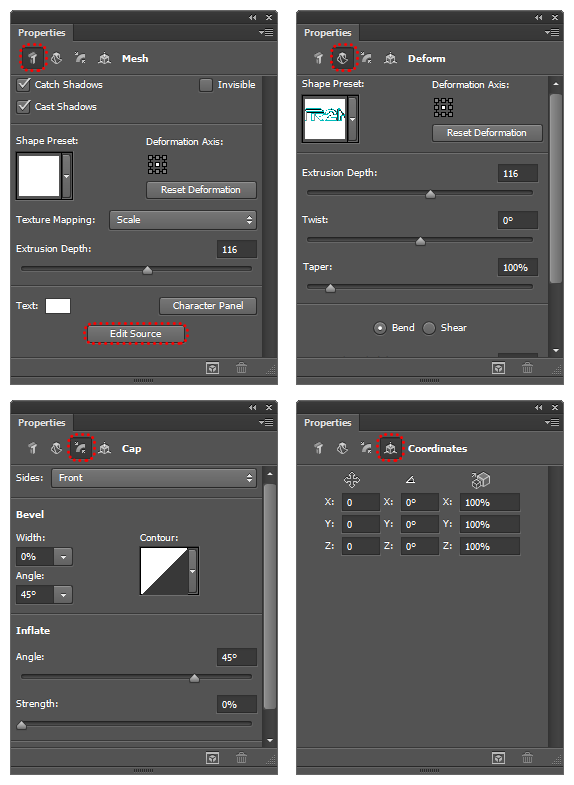
With the Text 3D Object selected, your Properties panel (Window > Properties) will display all the features you can find in Photoshop CS5’s Repoussé tool. To change your 3D text, just click on the Edit Source button in the Mesh tab.
No comments:
Post a Comment